
Files can only be added via the text editor. Options that include the text editor:
- Text
- Accordion
- Cards
- Split Screen
- Text with Background
- Text on Media
Instructions:
- Use the Media Embed option from the toolbar:

- Select Document from the file types
- Find your document in the library or upload a new one.
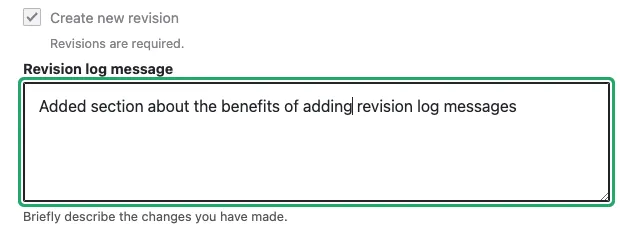
Every time you make a change to a page, a new revision is created. This creates a safety net should you make a mistake e.g. deleting an important content section.
Adding a Revision Log Message
benefits.....
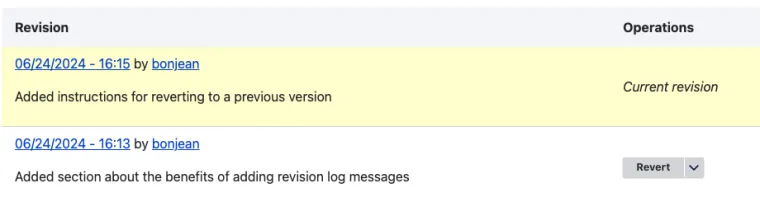
Reverting back to a previous revision
Click the revisions tab at the top of the page. Here you will see rows of revisions with the newest on the top. You'll see a timestamp for when the changes were made, the netID of the person who made the changes, and any revision messages that were added. Now you can see how the revision messages can help you determine which version you want to revert to. However, you can also see what the revision looks like by clicking on the timestamp. (please note: when previewing a previous revision, your sidebar navigation will not appear, and therefore the layout might look distorted.)
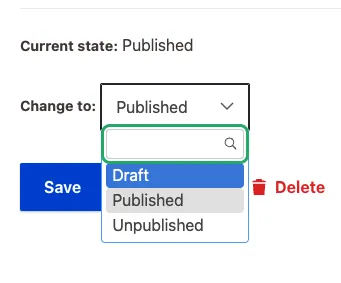
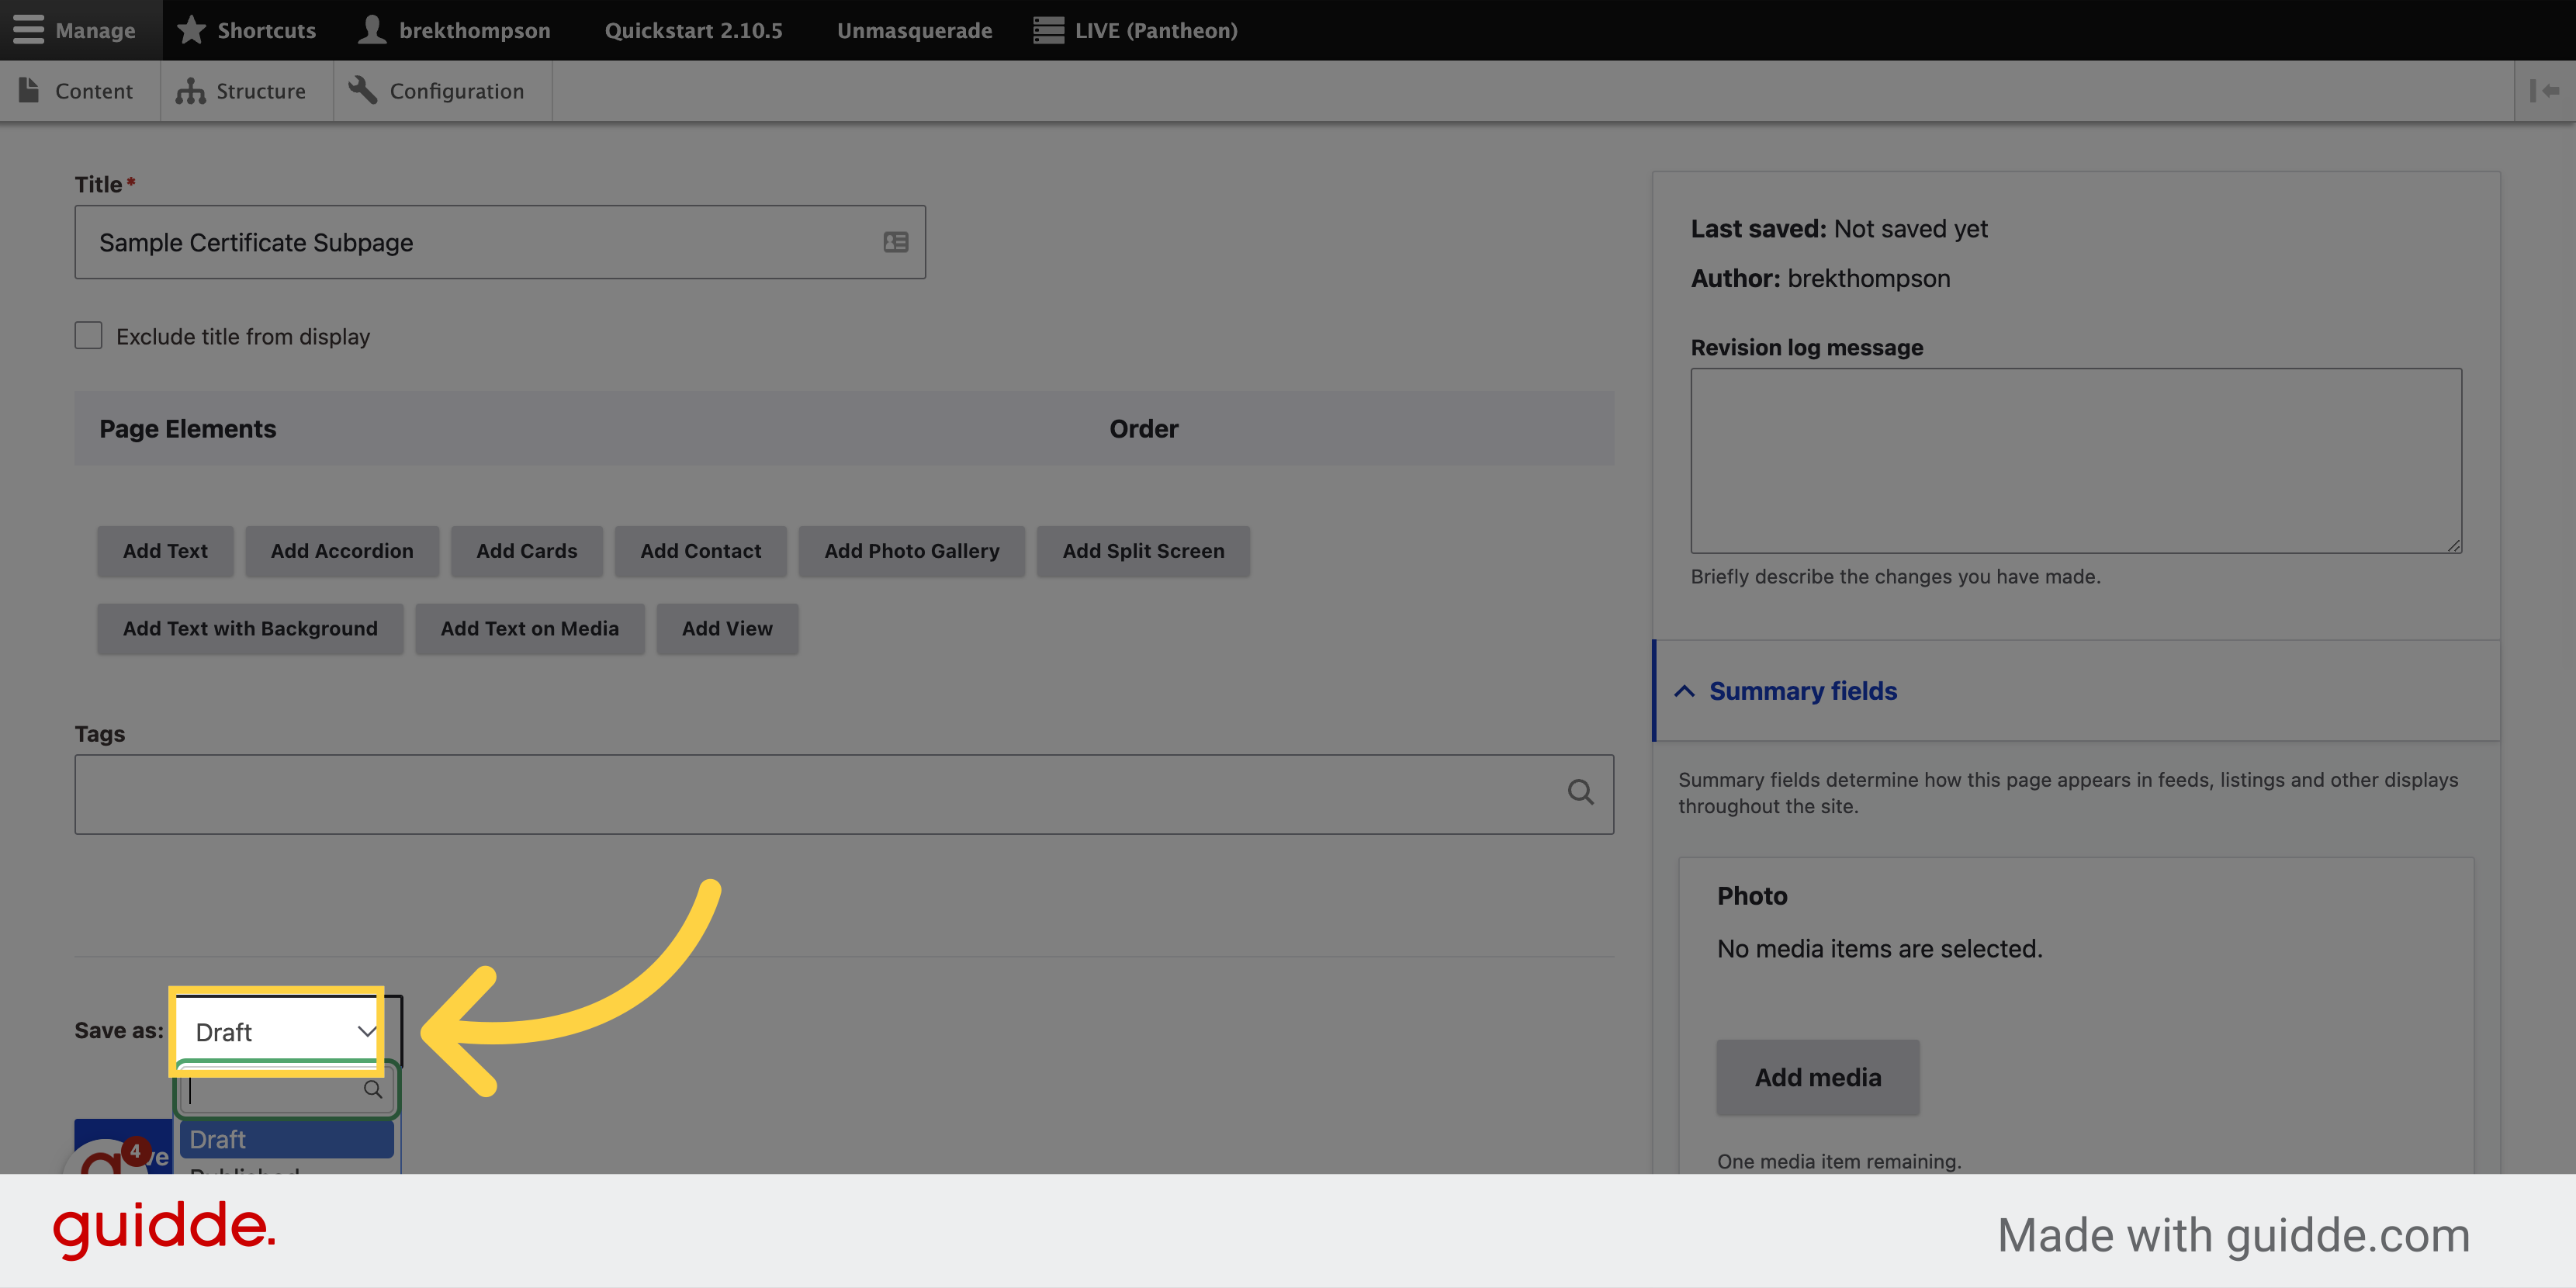
Creating a draft
Create a draft version of your page that you can continue to work on later, without disrupting the published version, by changing the Current State to Draft:
Improved, targeted menu editing functionality
We've made adding to and editing your menus easier by breaking our navigation structure into smaller sections that only you and your team members will be able to access.
1. We're going to create a new page
We're going to create a new page for the Responsible Conduct of Research section. I am logged in as a member of that team.
If you are assigning or re-assigning a menu location for a page that already exists on the website, skip to step 9.
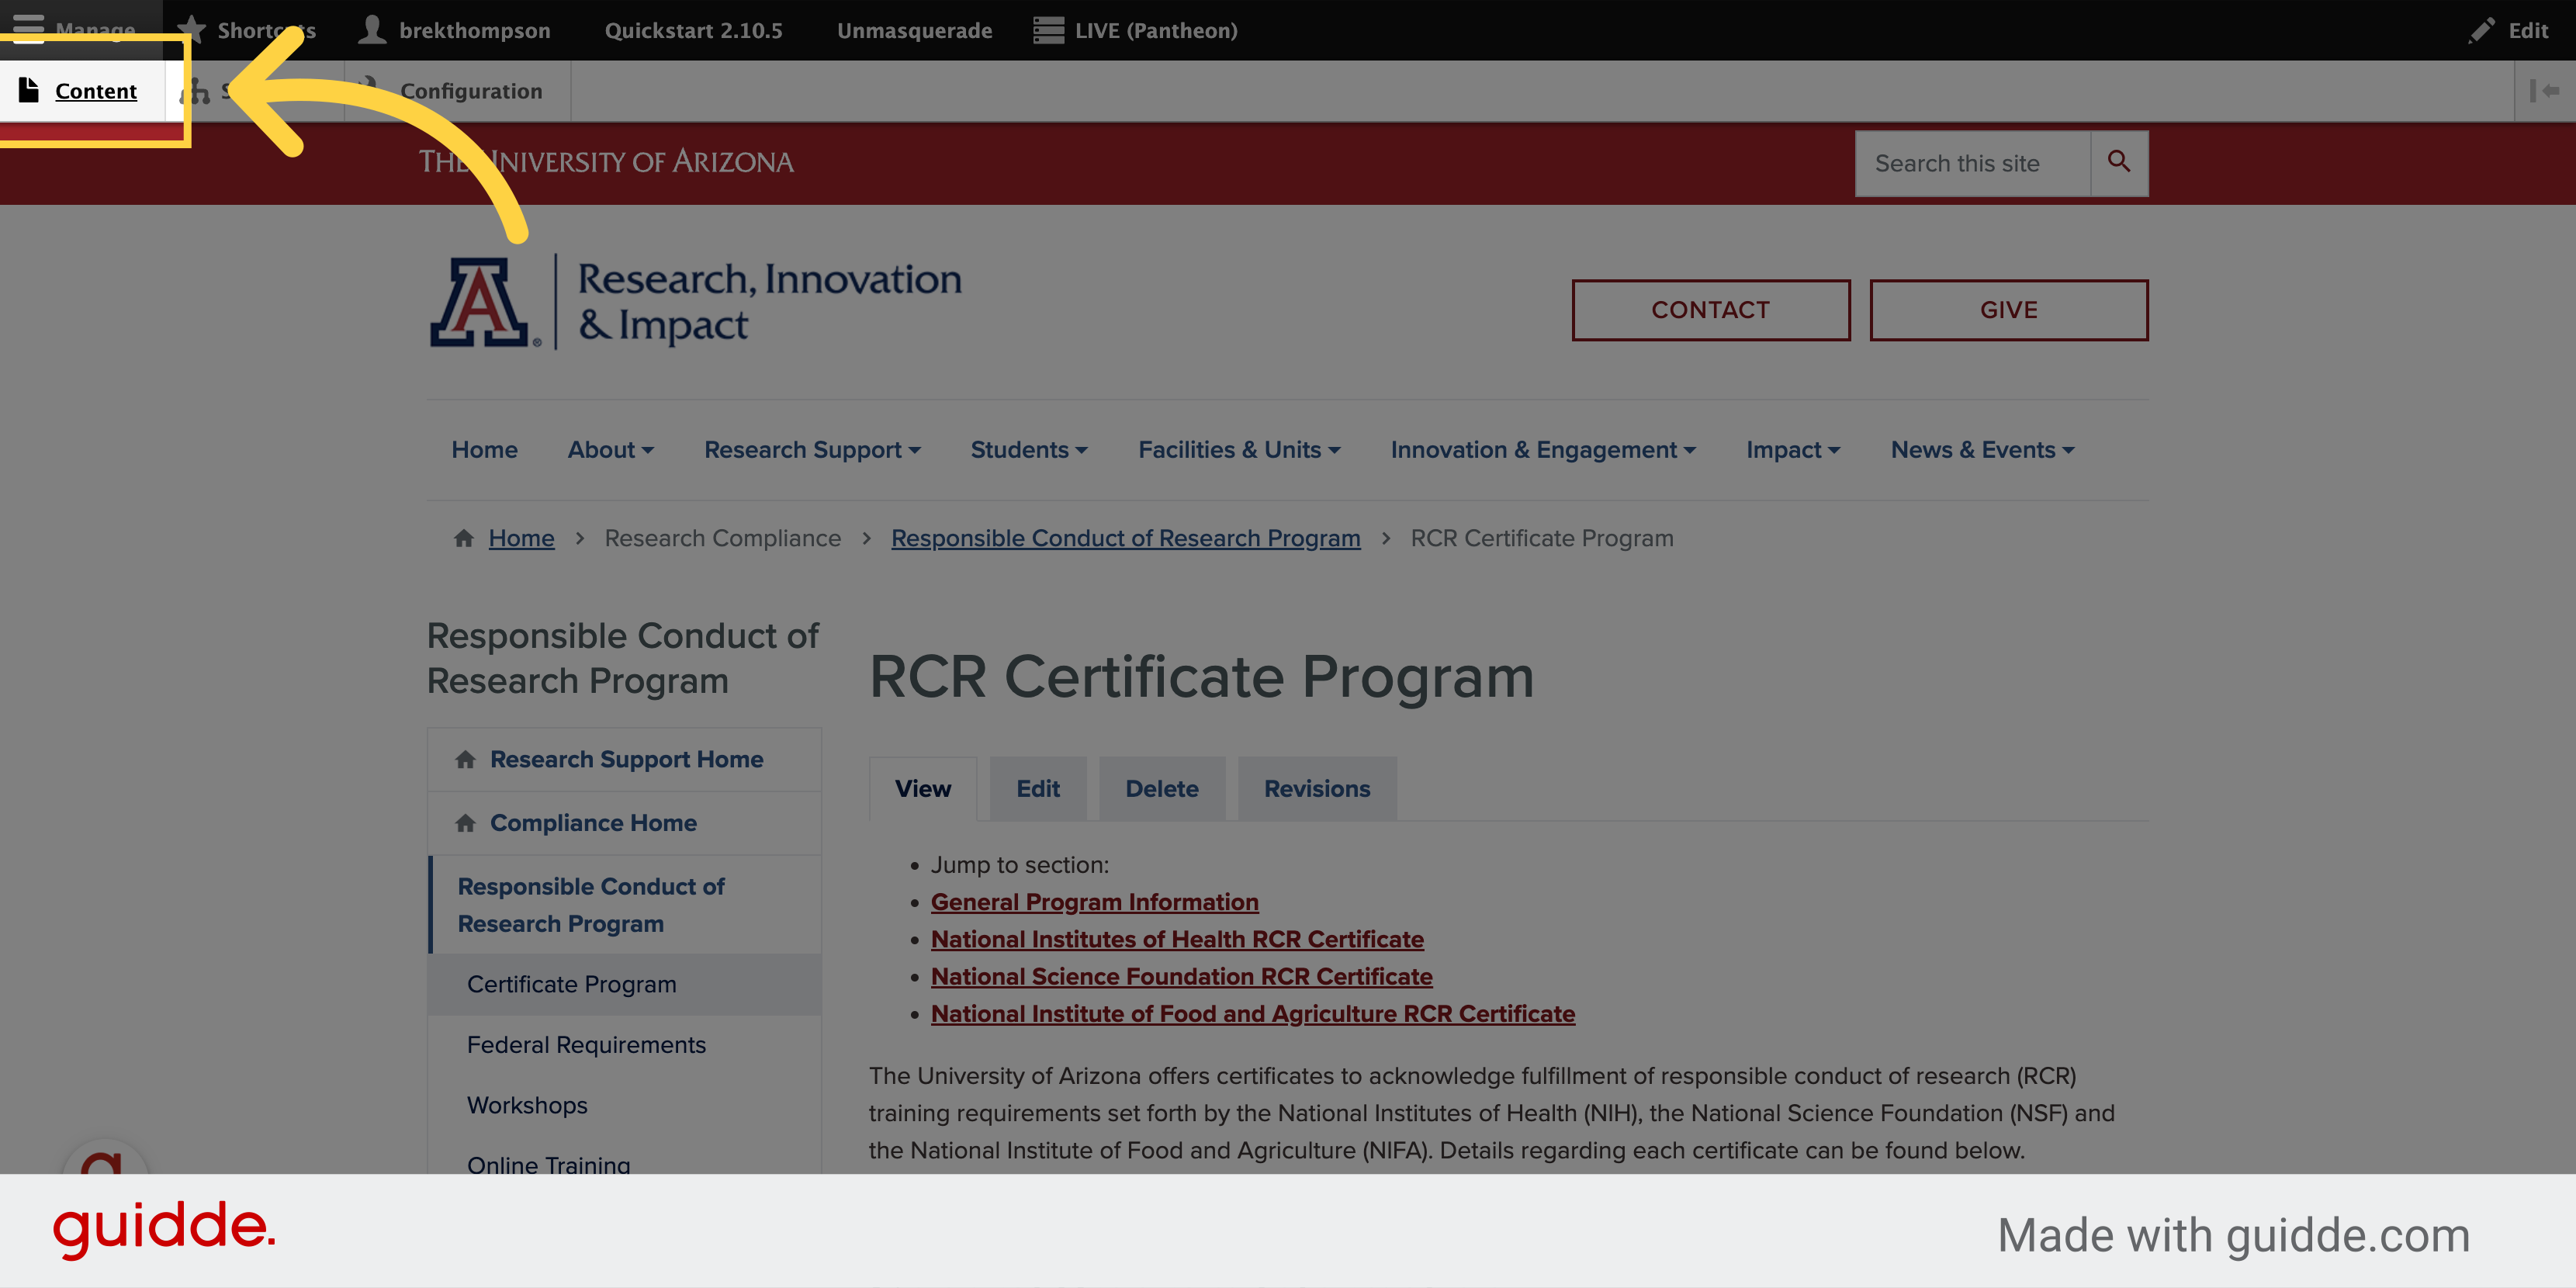
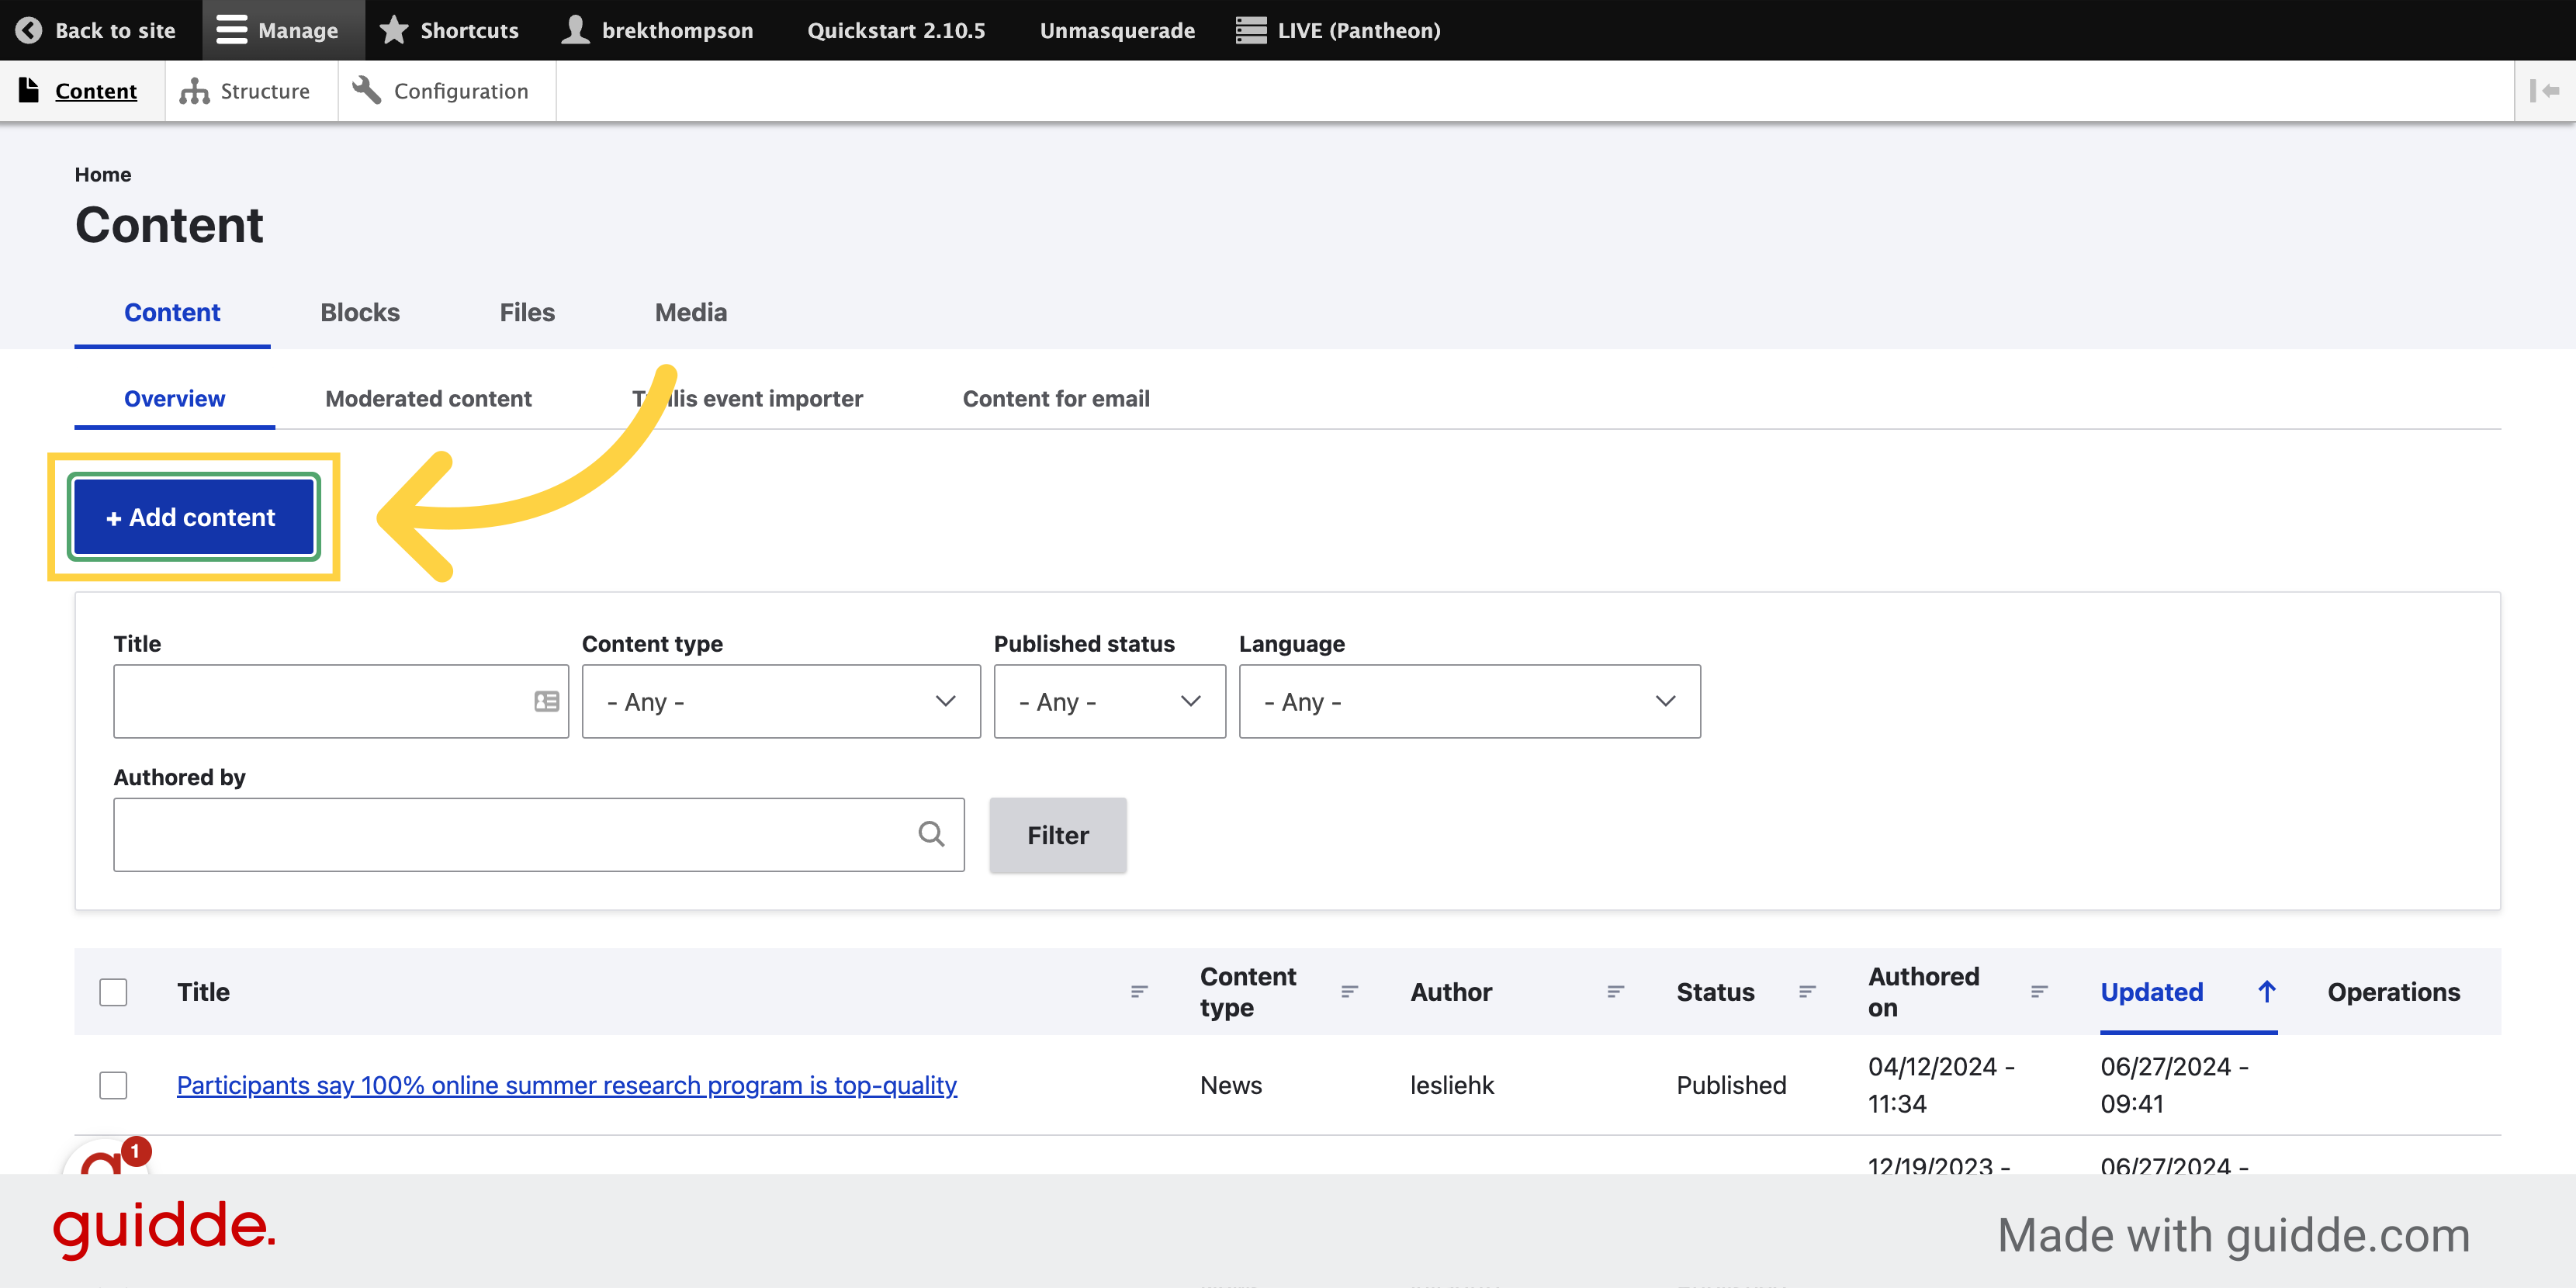
2. Click "Add content"
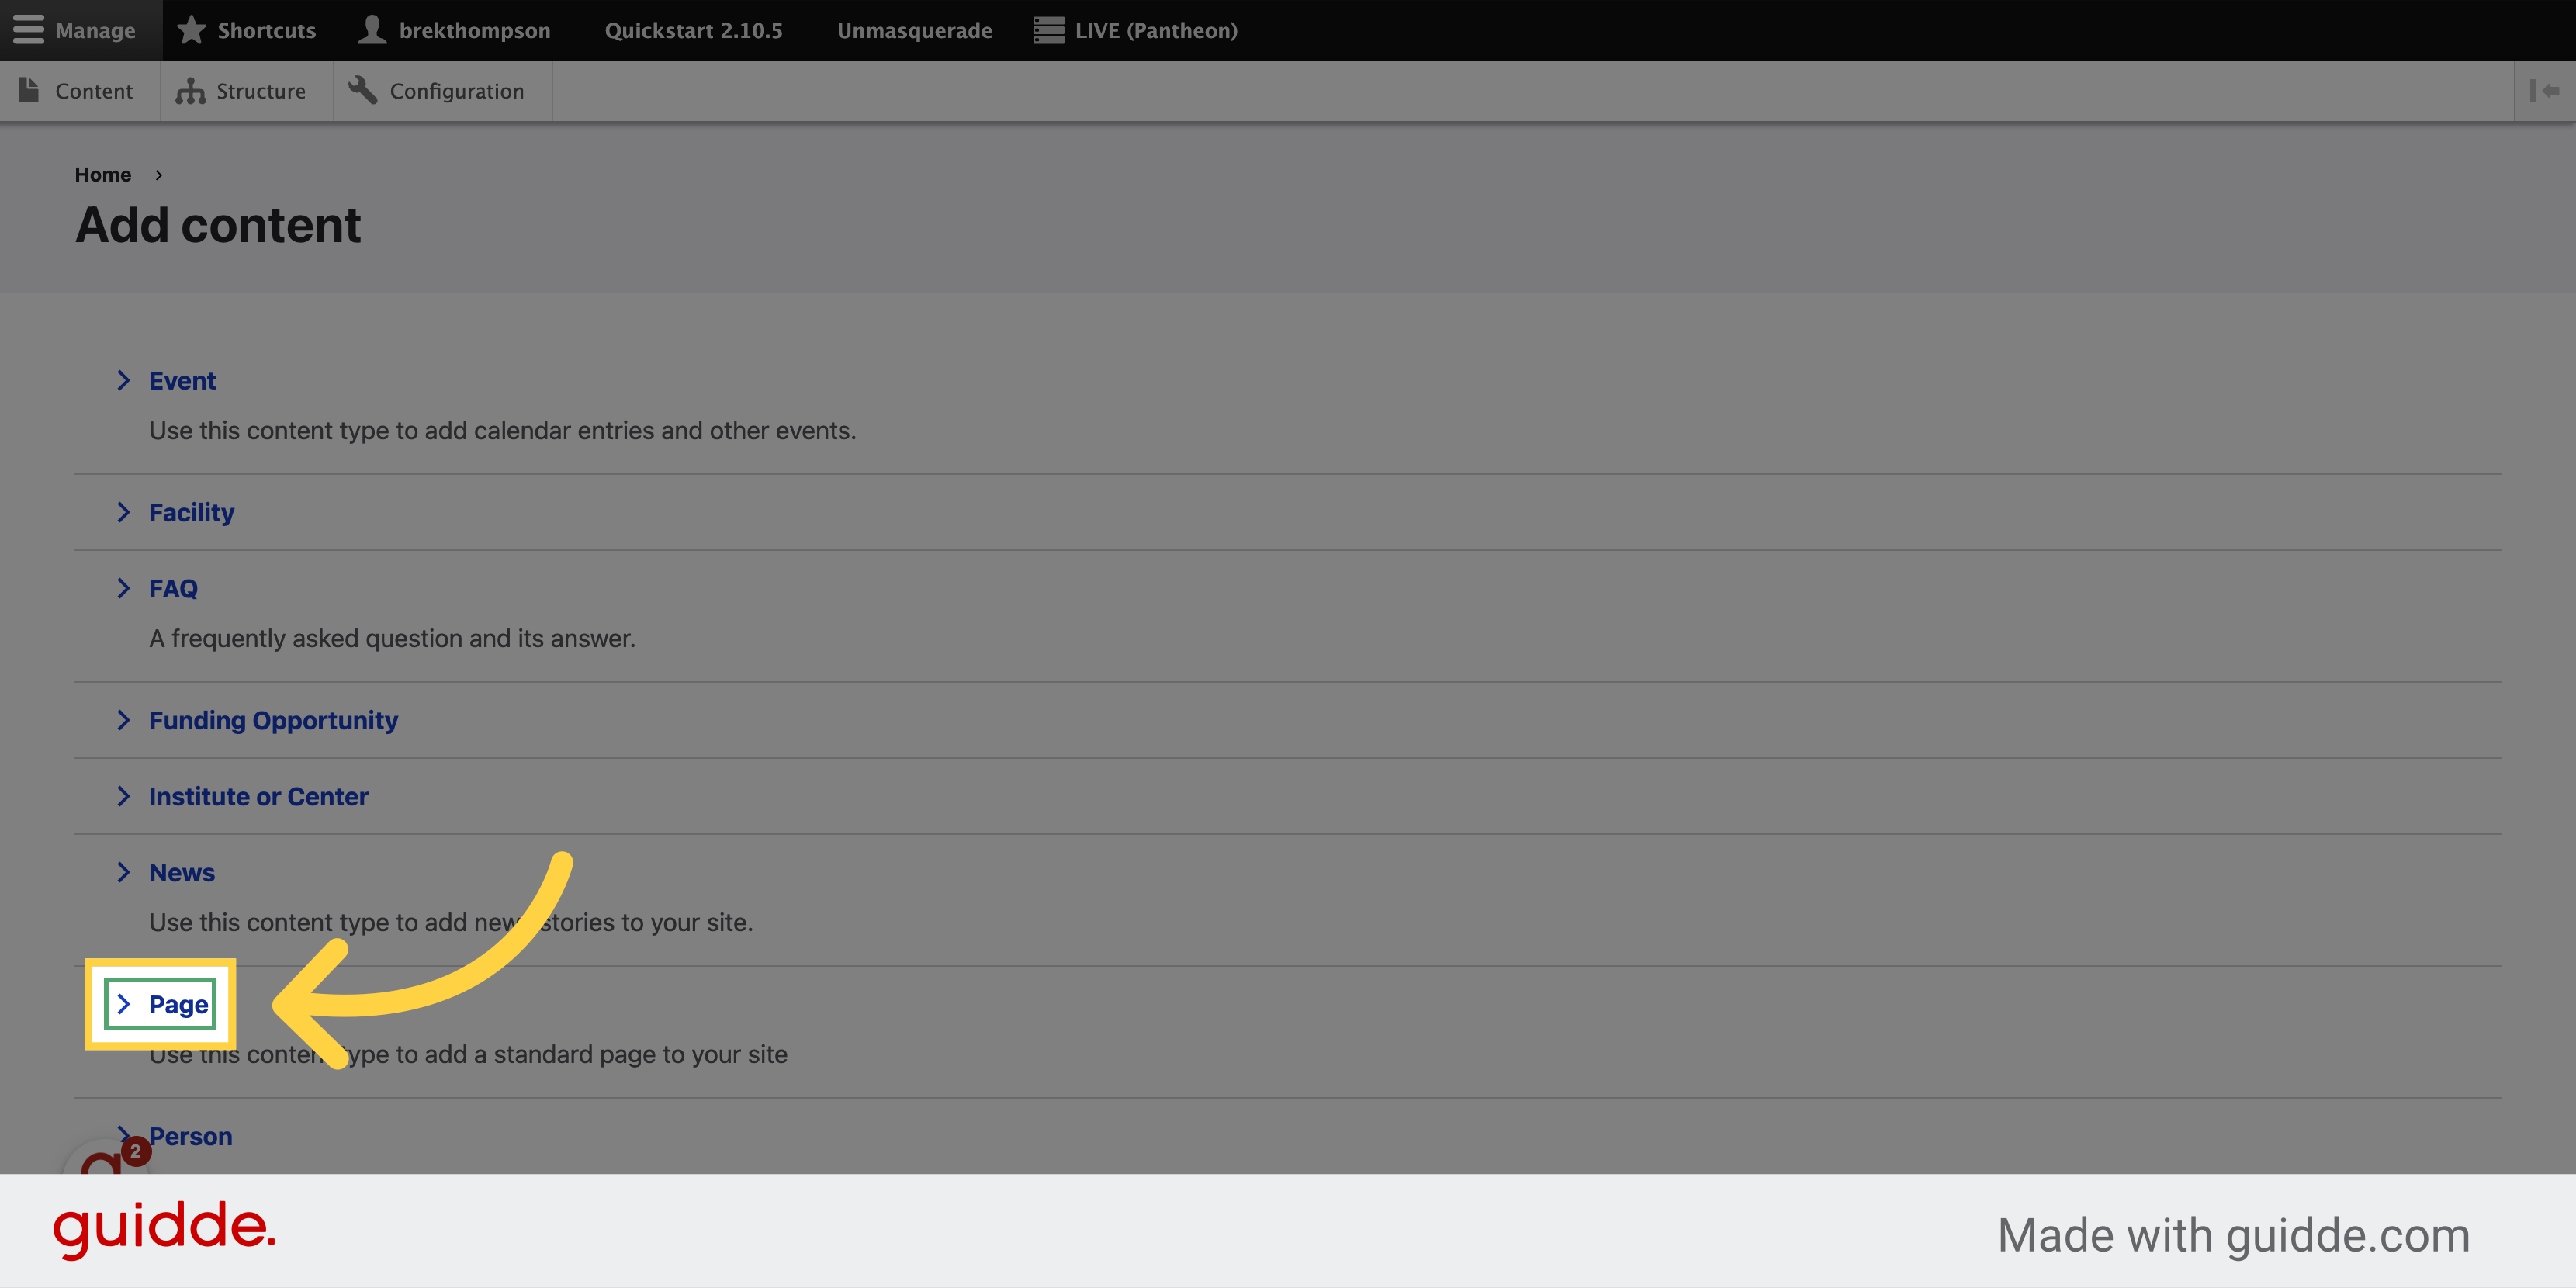
3. Select the Page content type
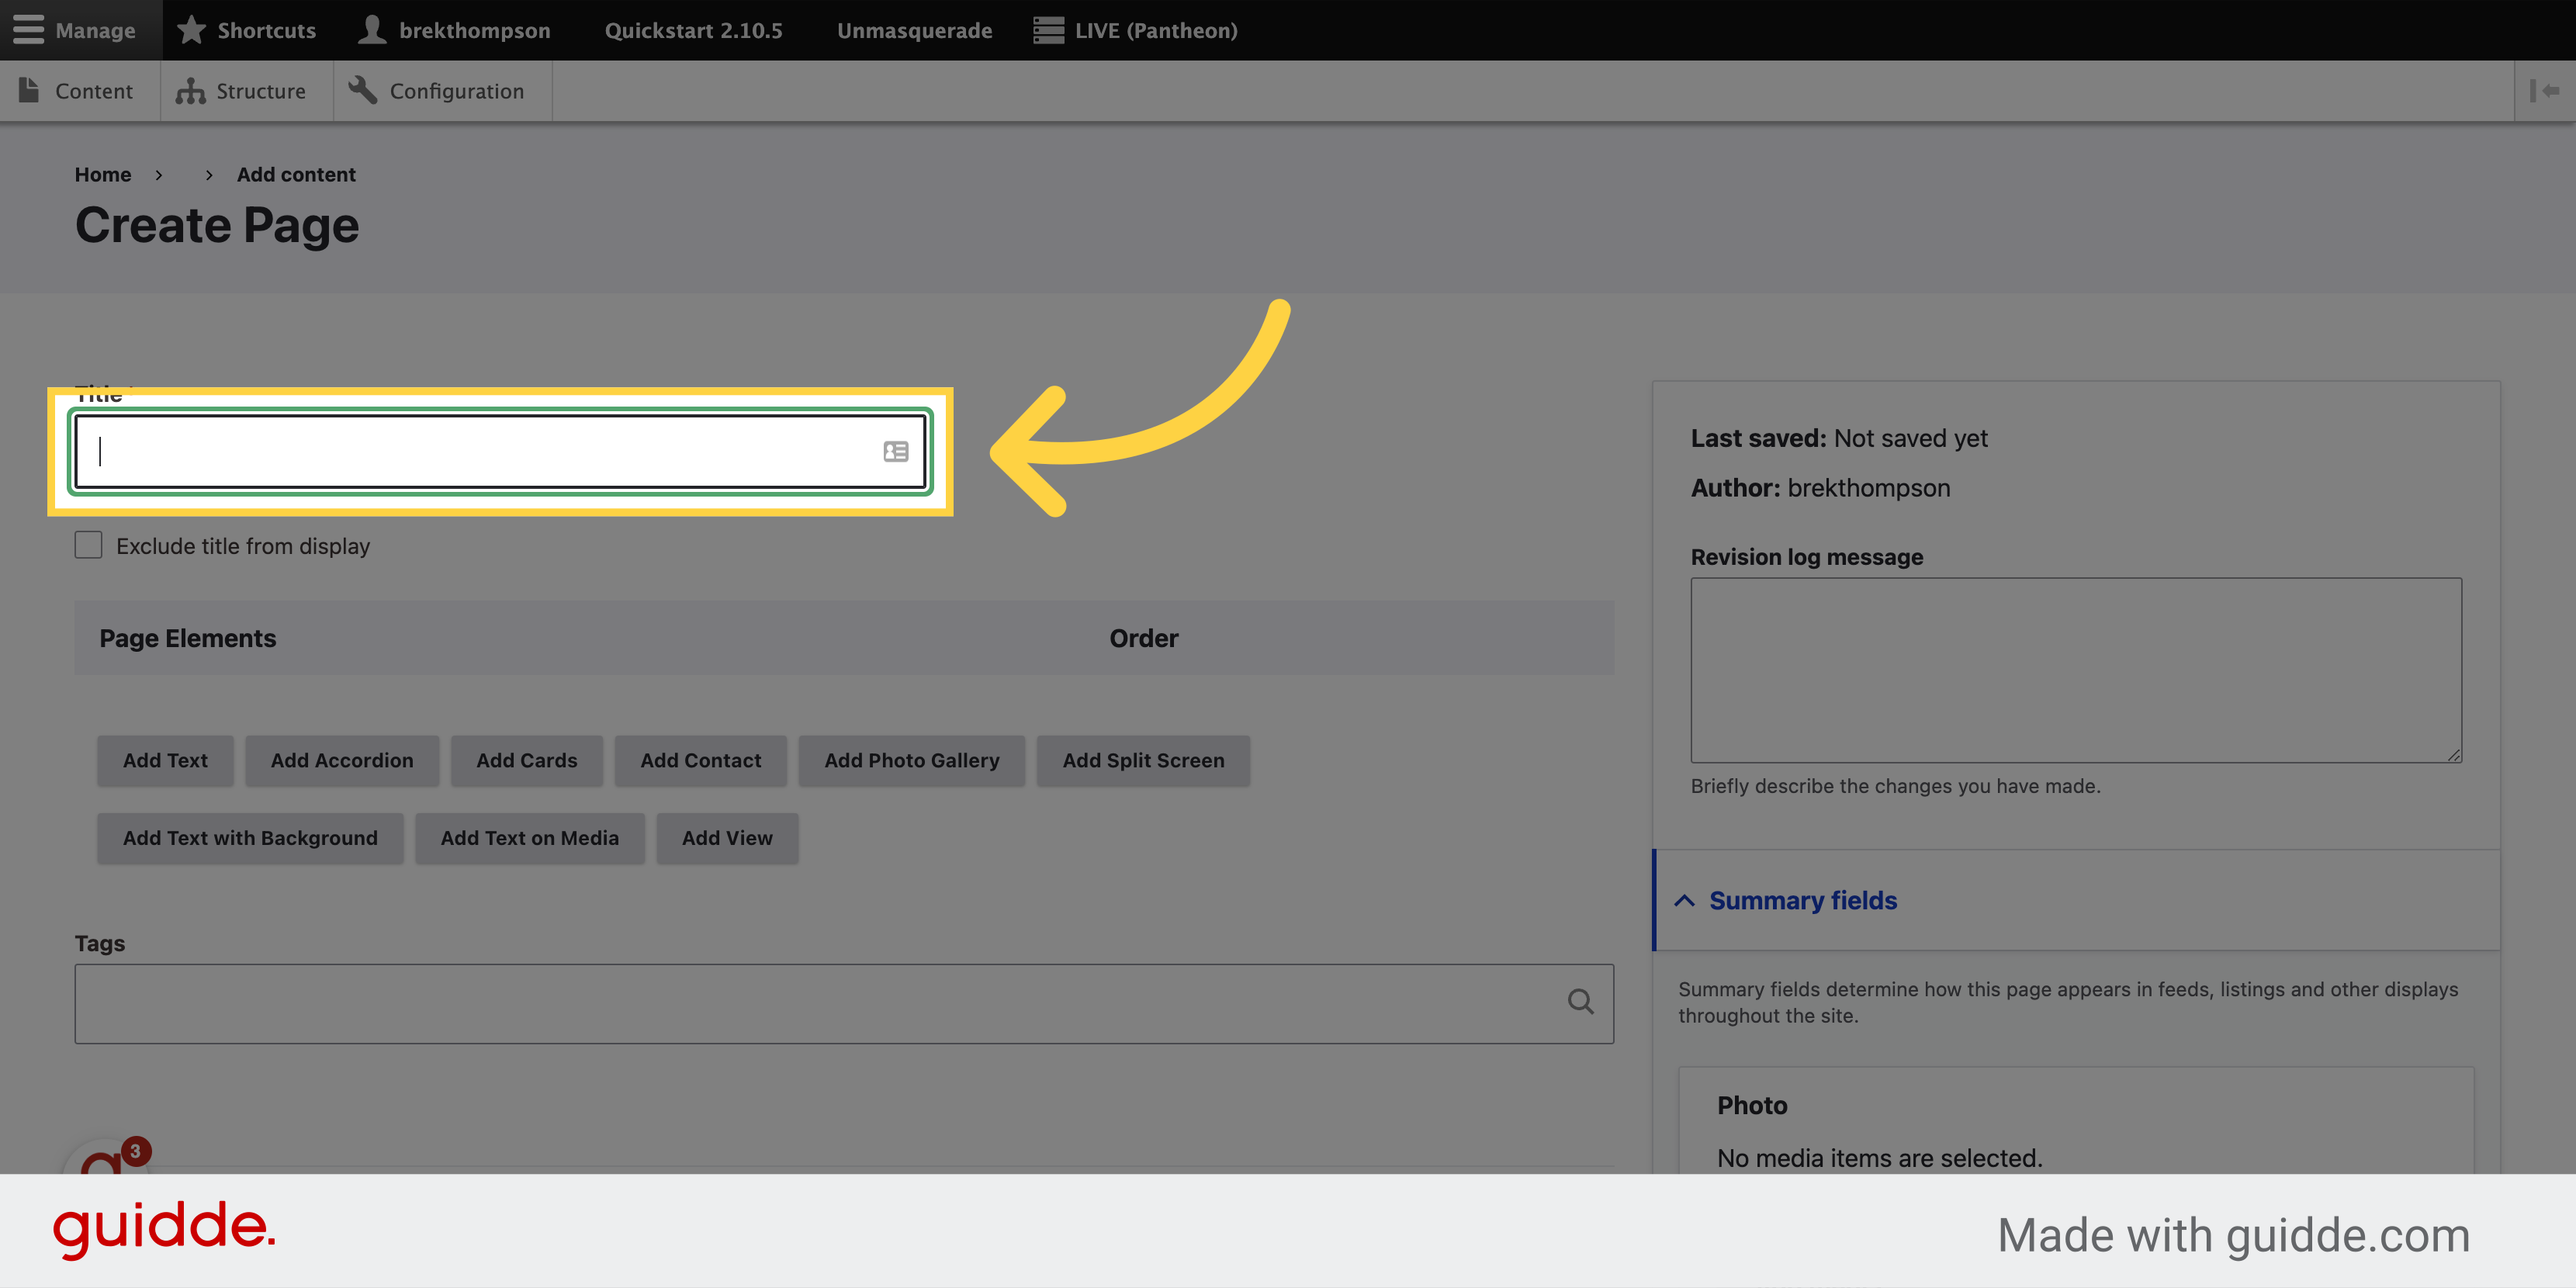
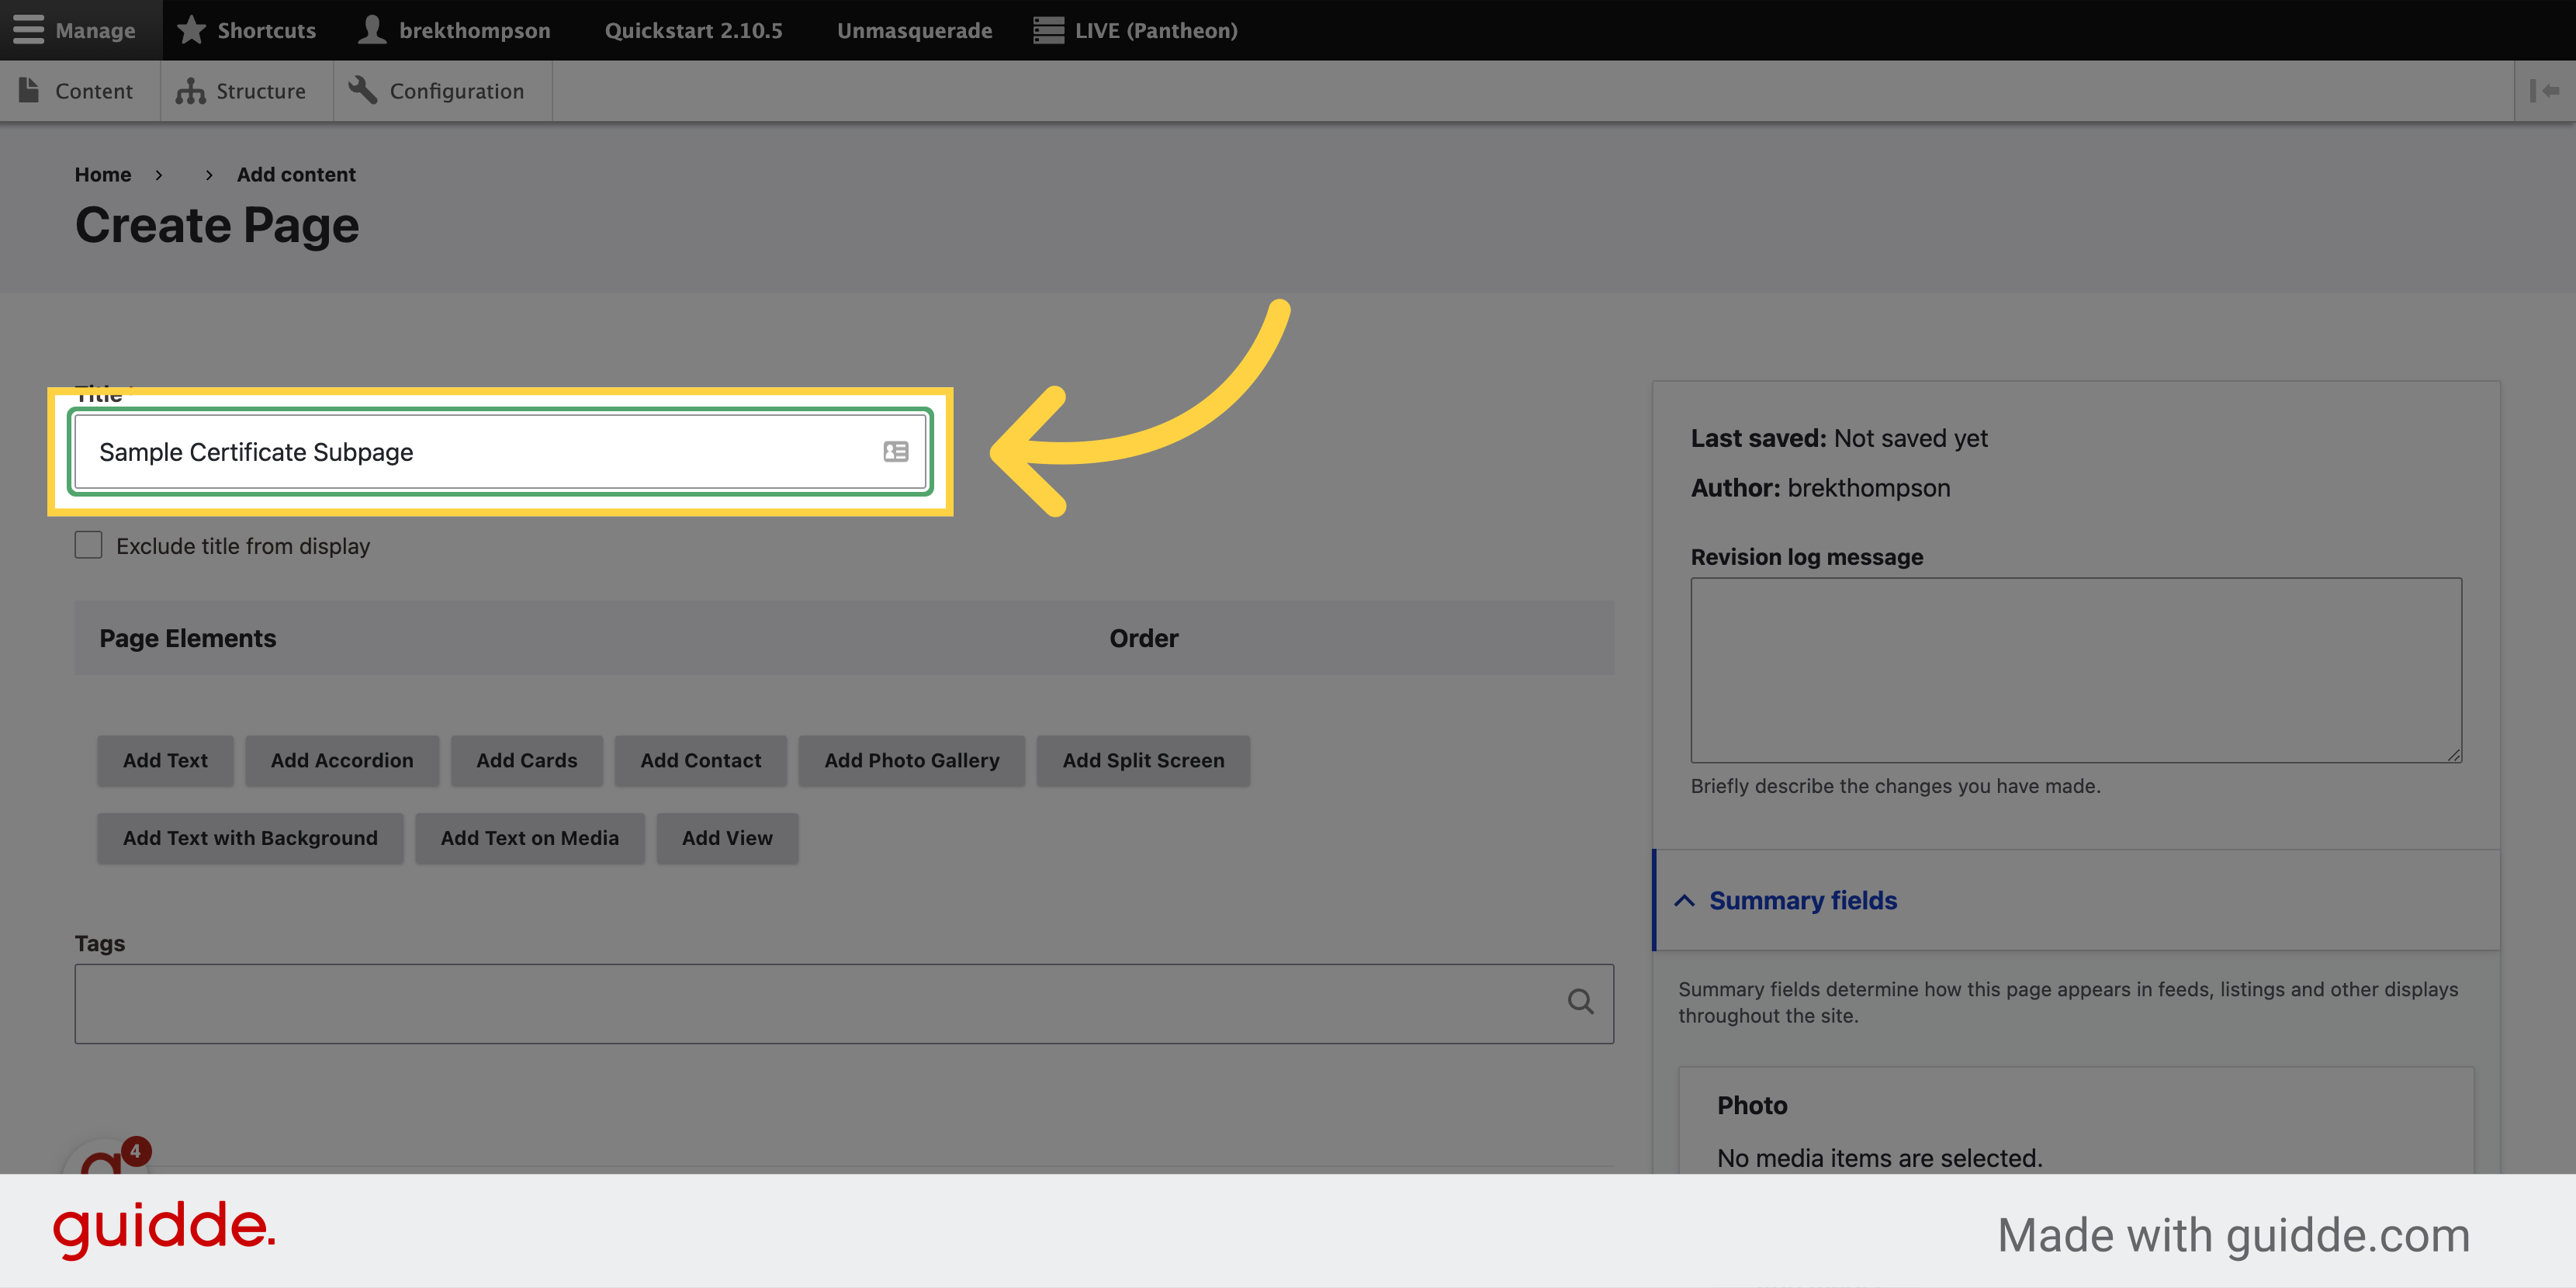
4. Type in your new page title
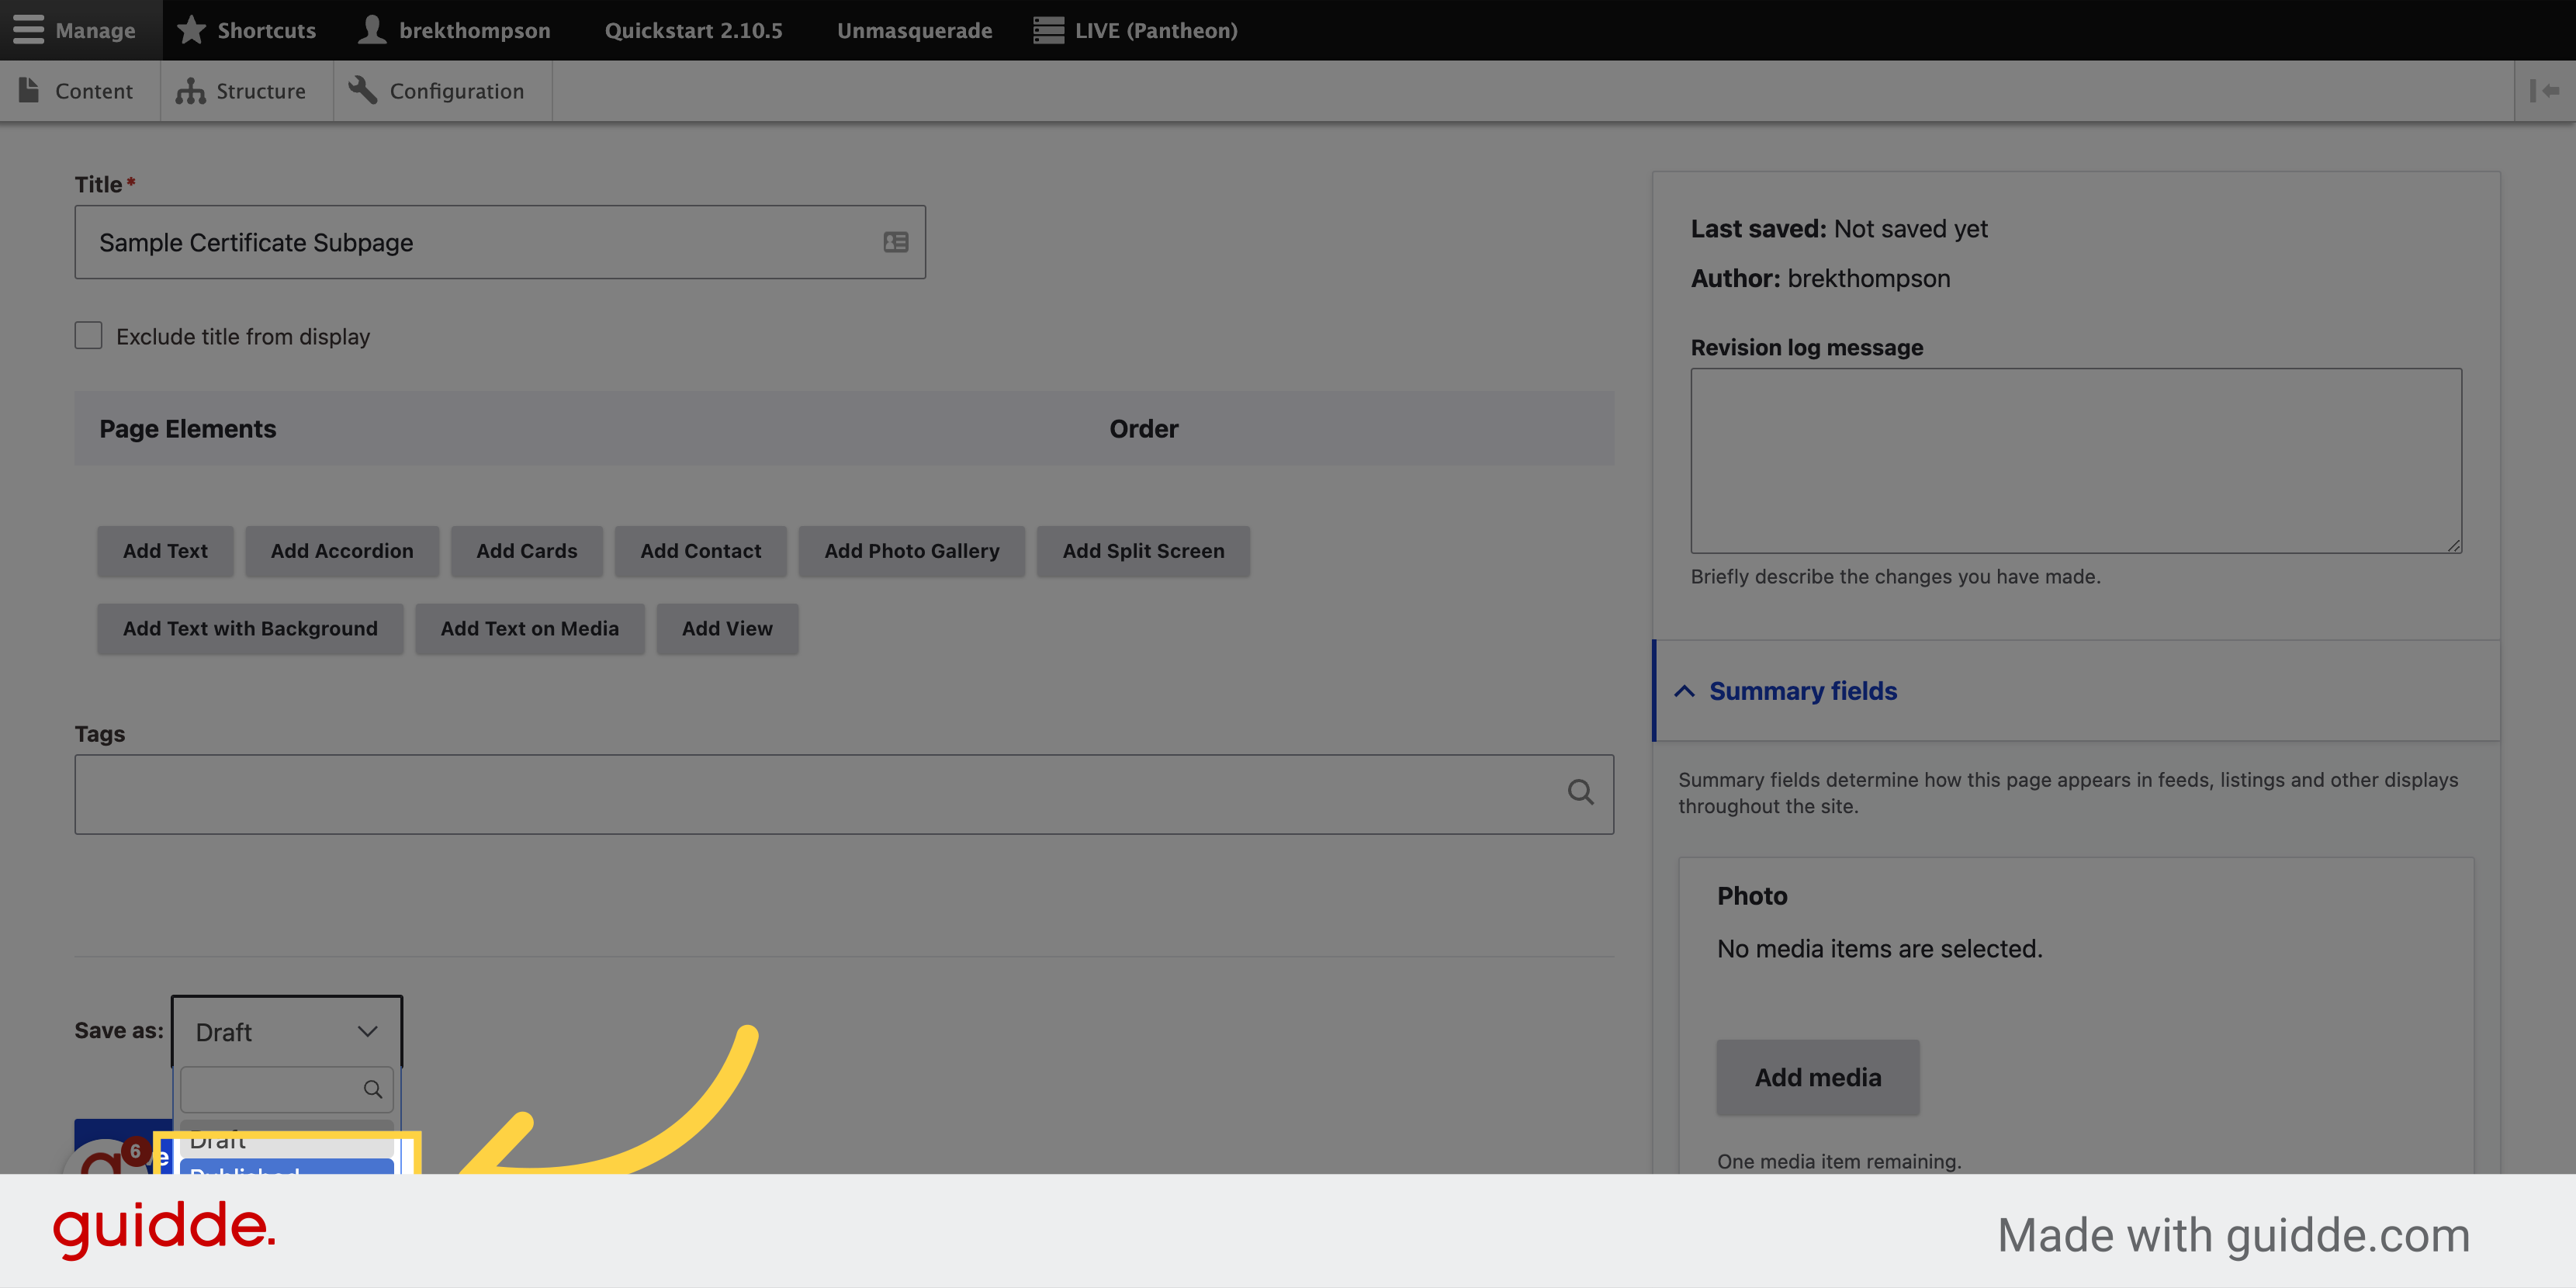
5. Select your publication state
We're going to publish our example page so we can see it right away in the navigation menu. But you can leave yours in draft state and still assign it a place in your menu.
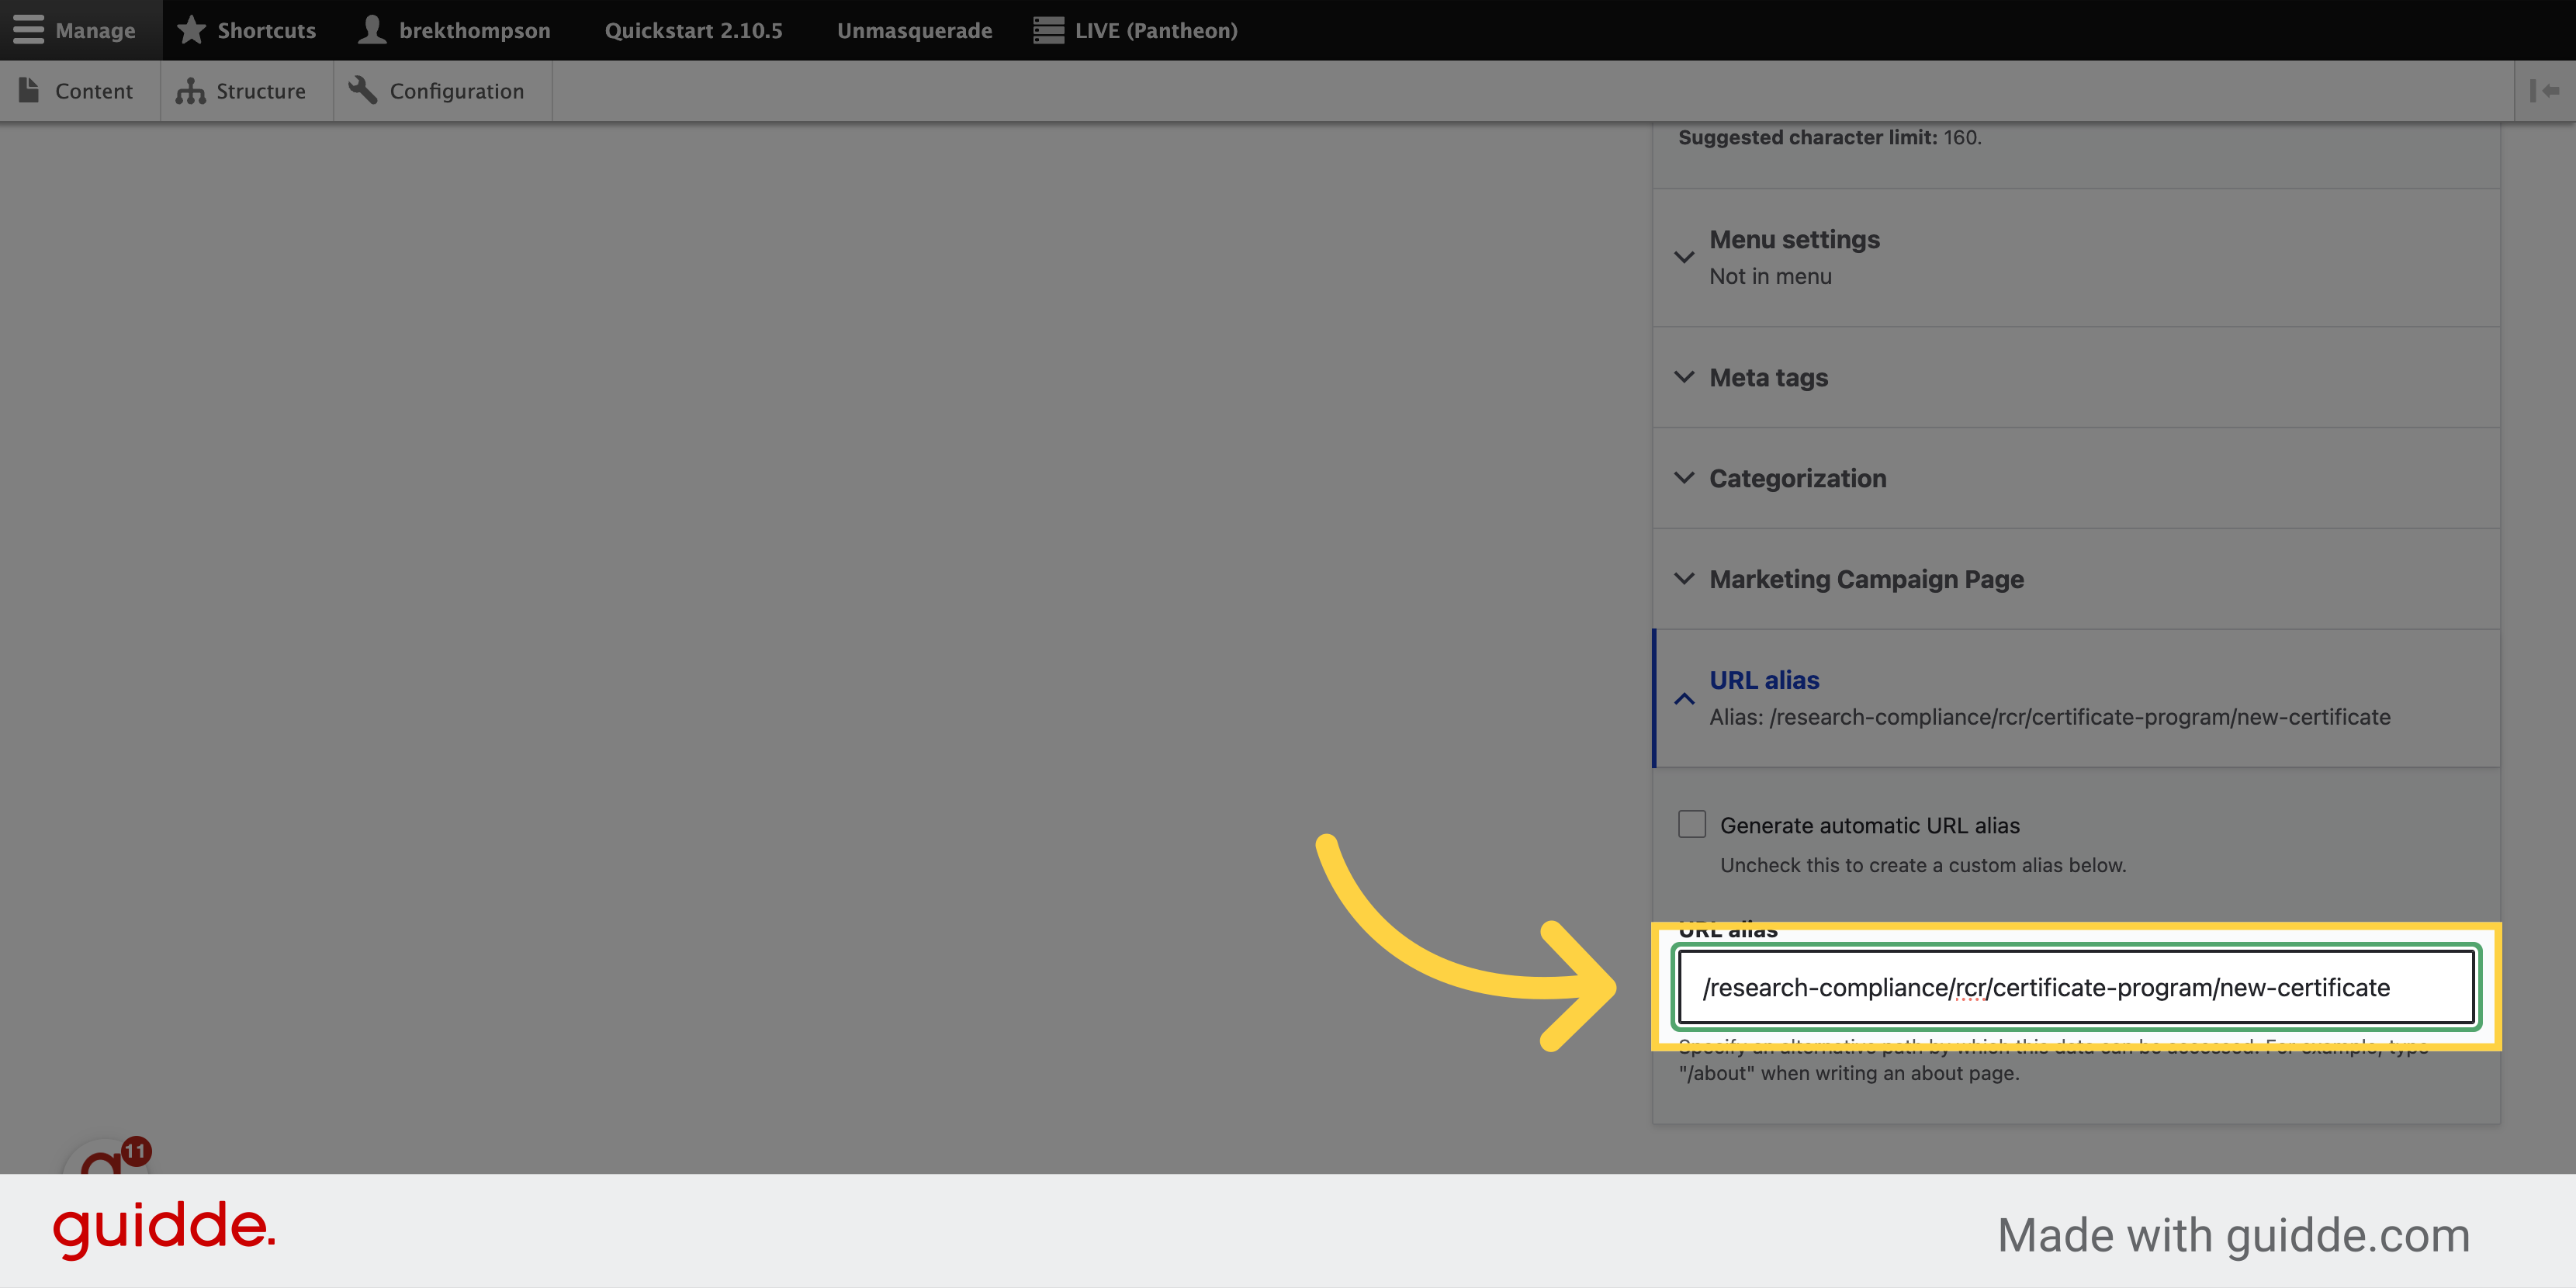
6. Here's where we give our page its url

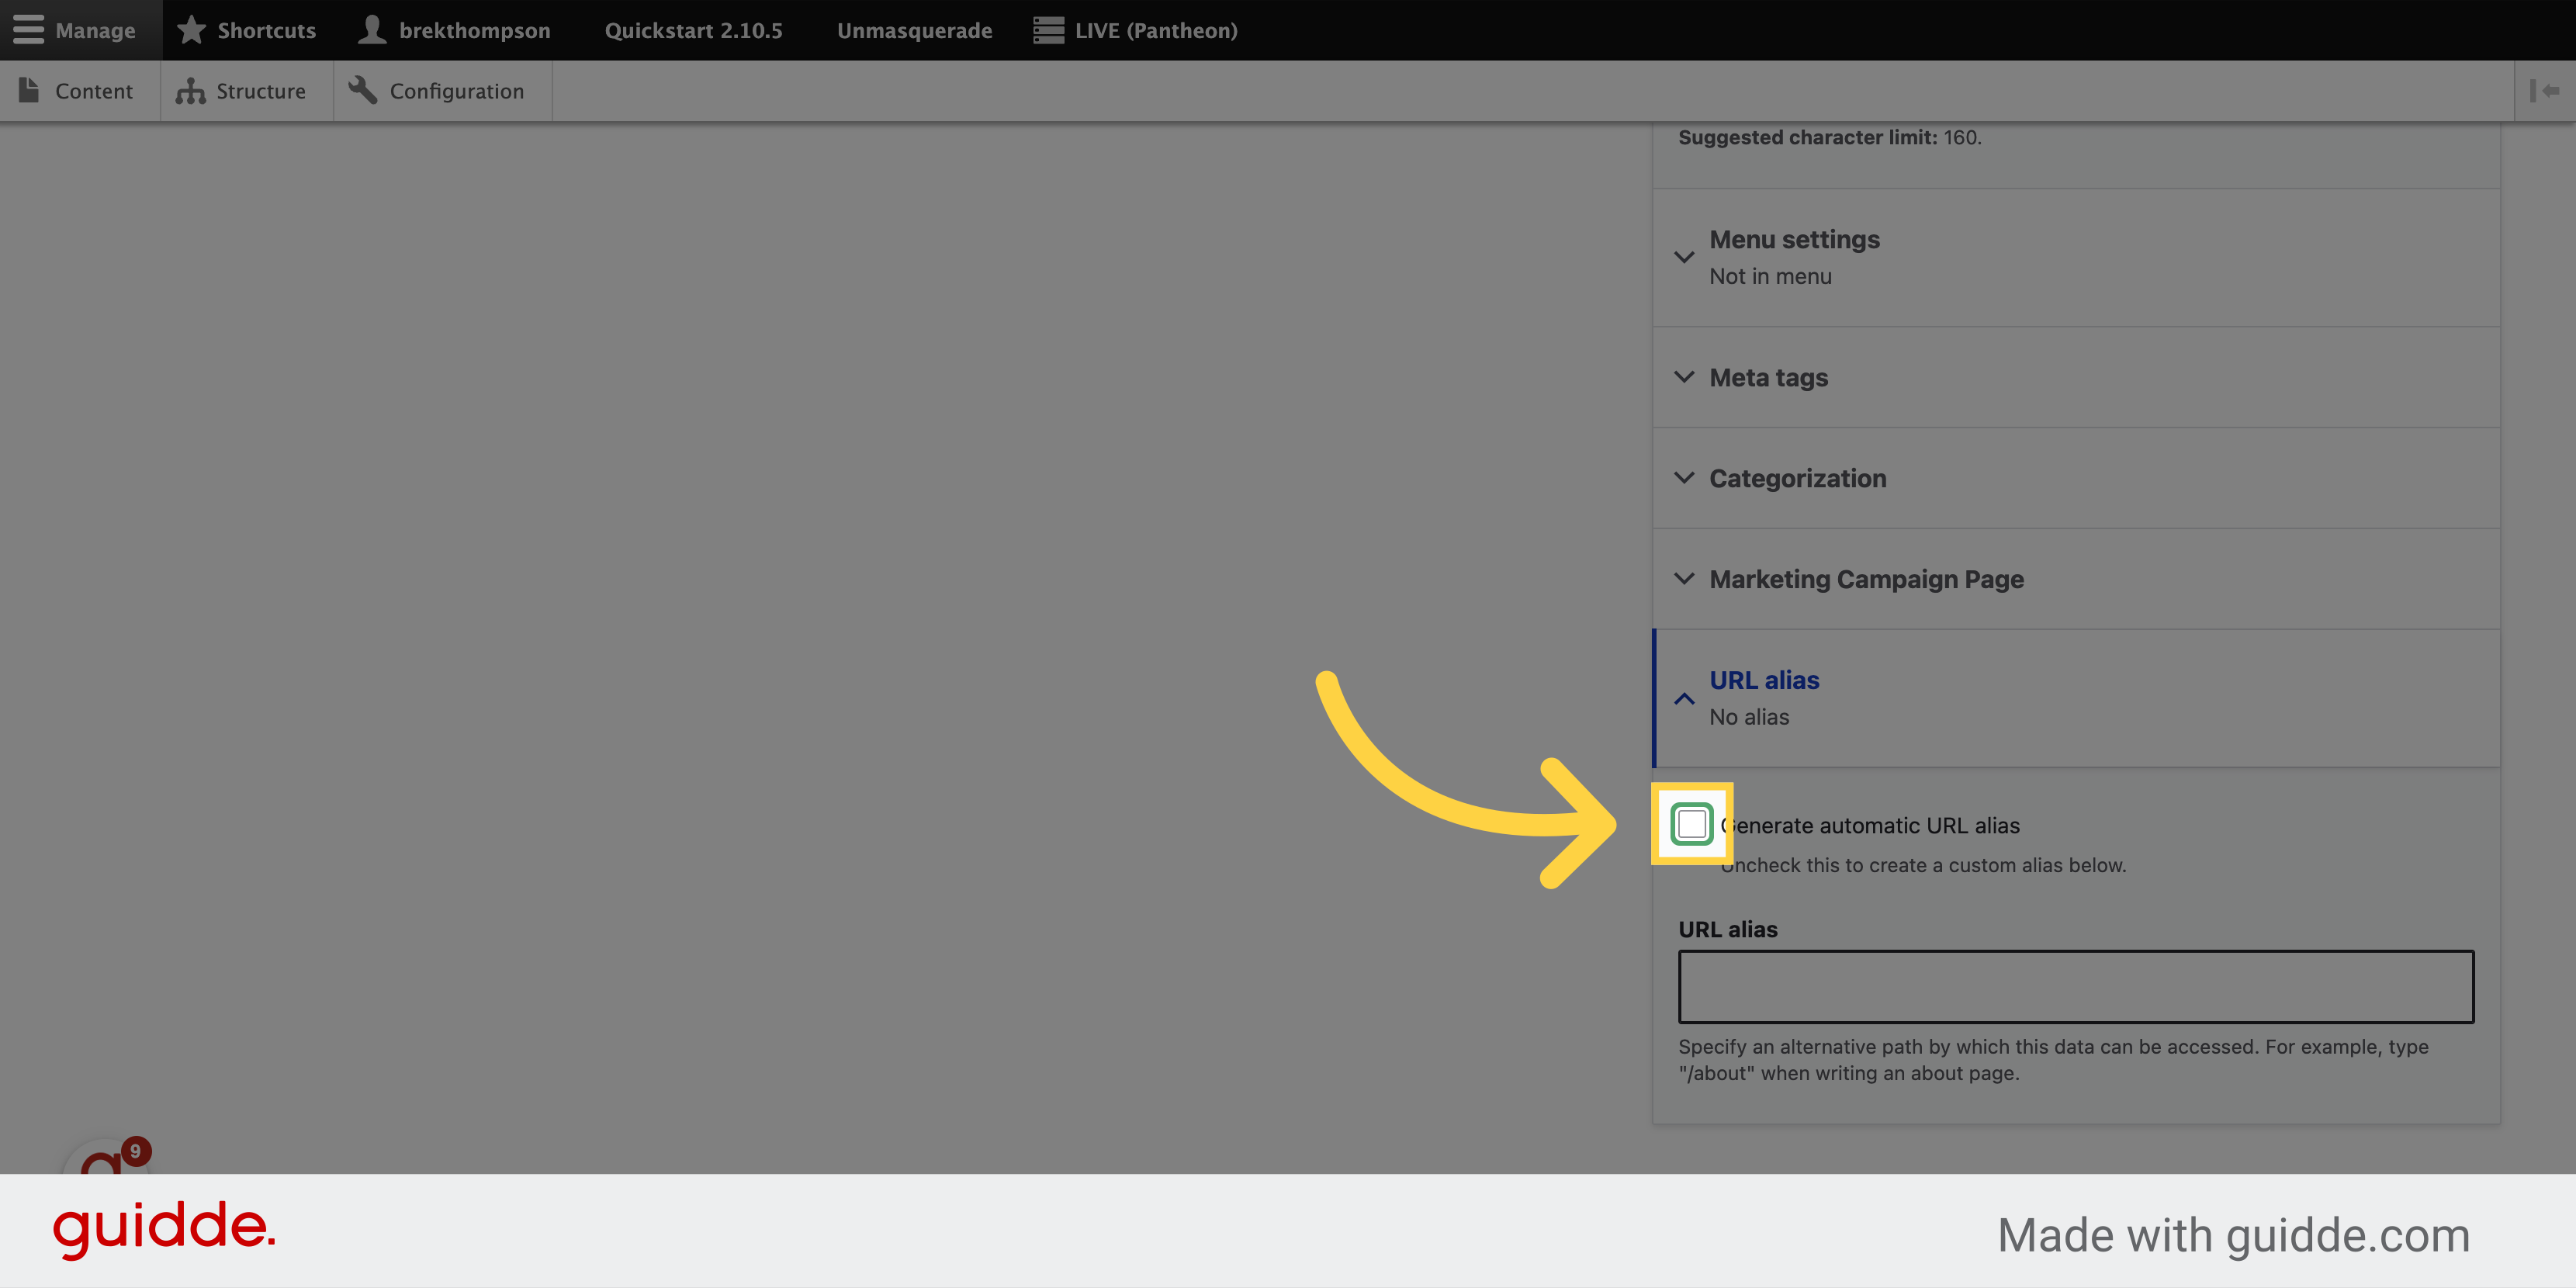
7. Uncheck URL Alias box
We're unchecking the box to generate an automatic url alias so that we can assign it a path that matches our navigation hierarchy.

making the editable url field appear
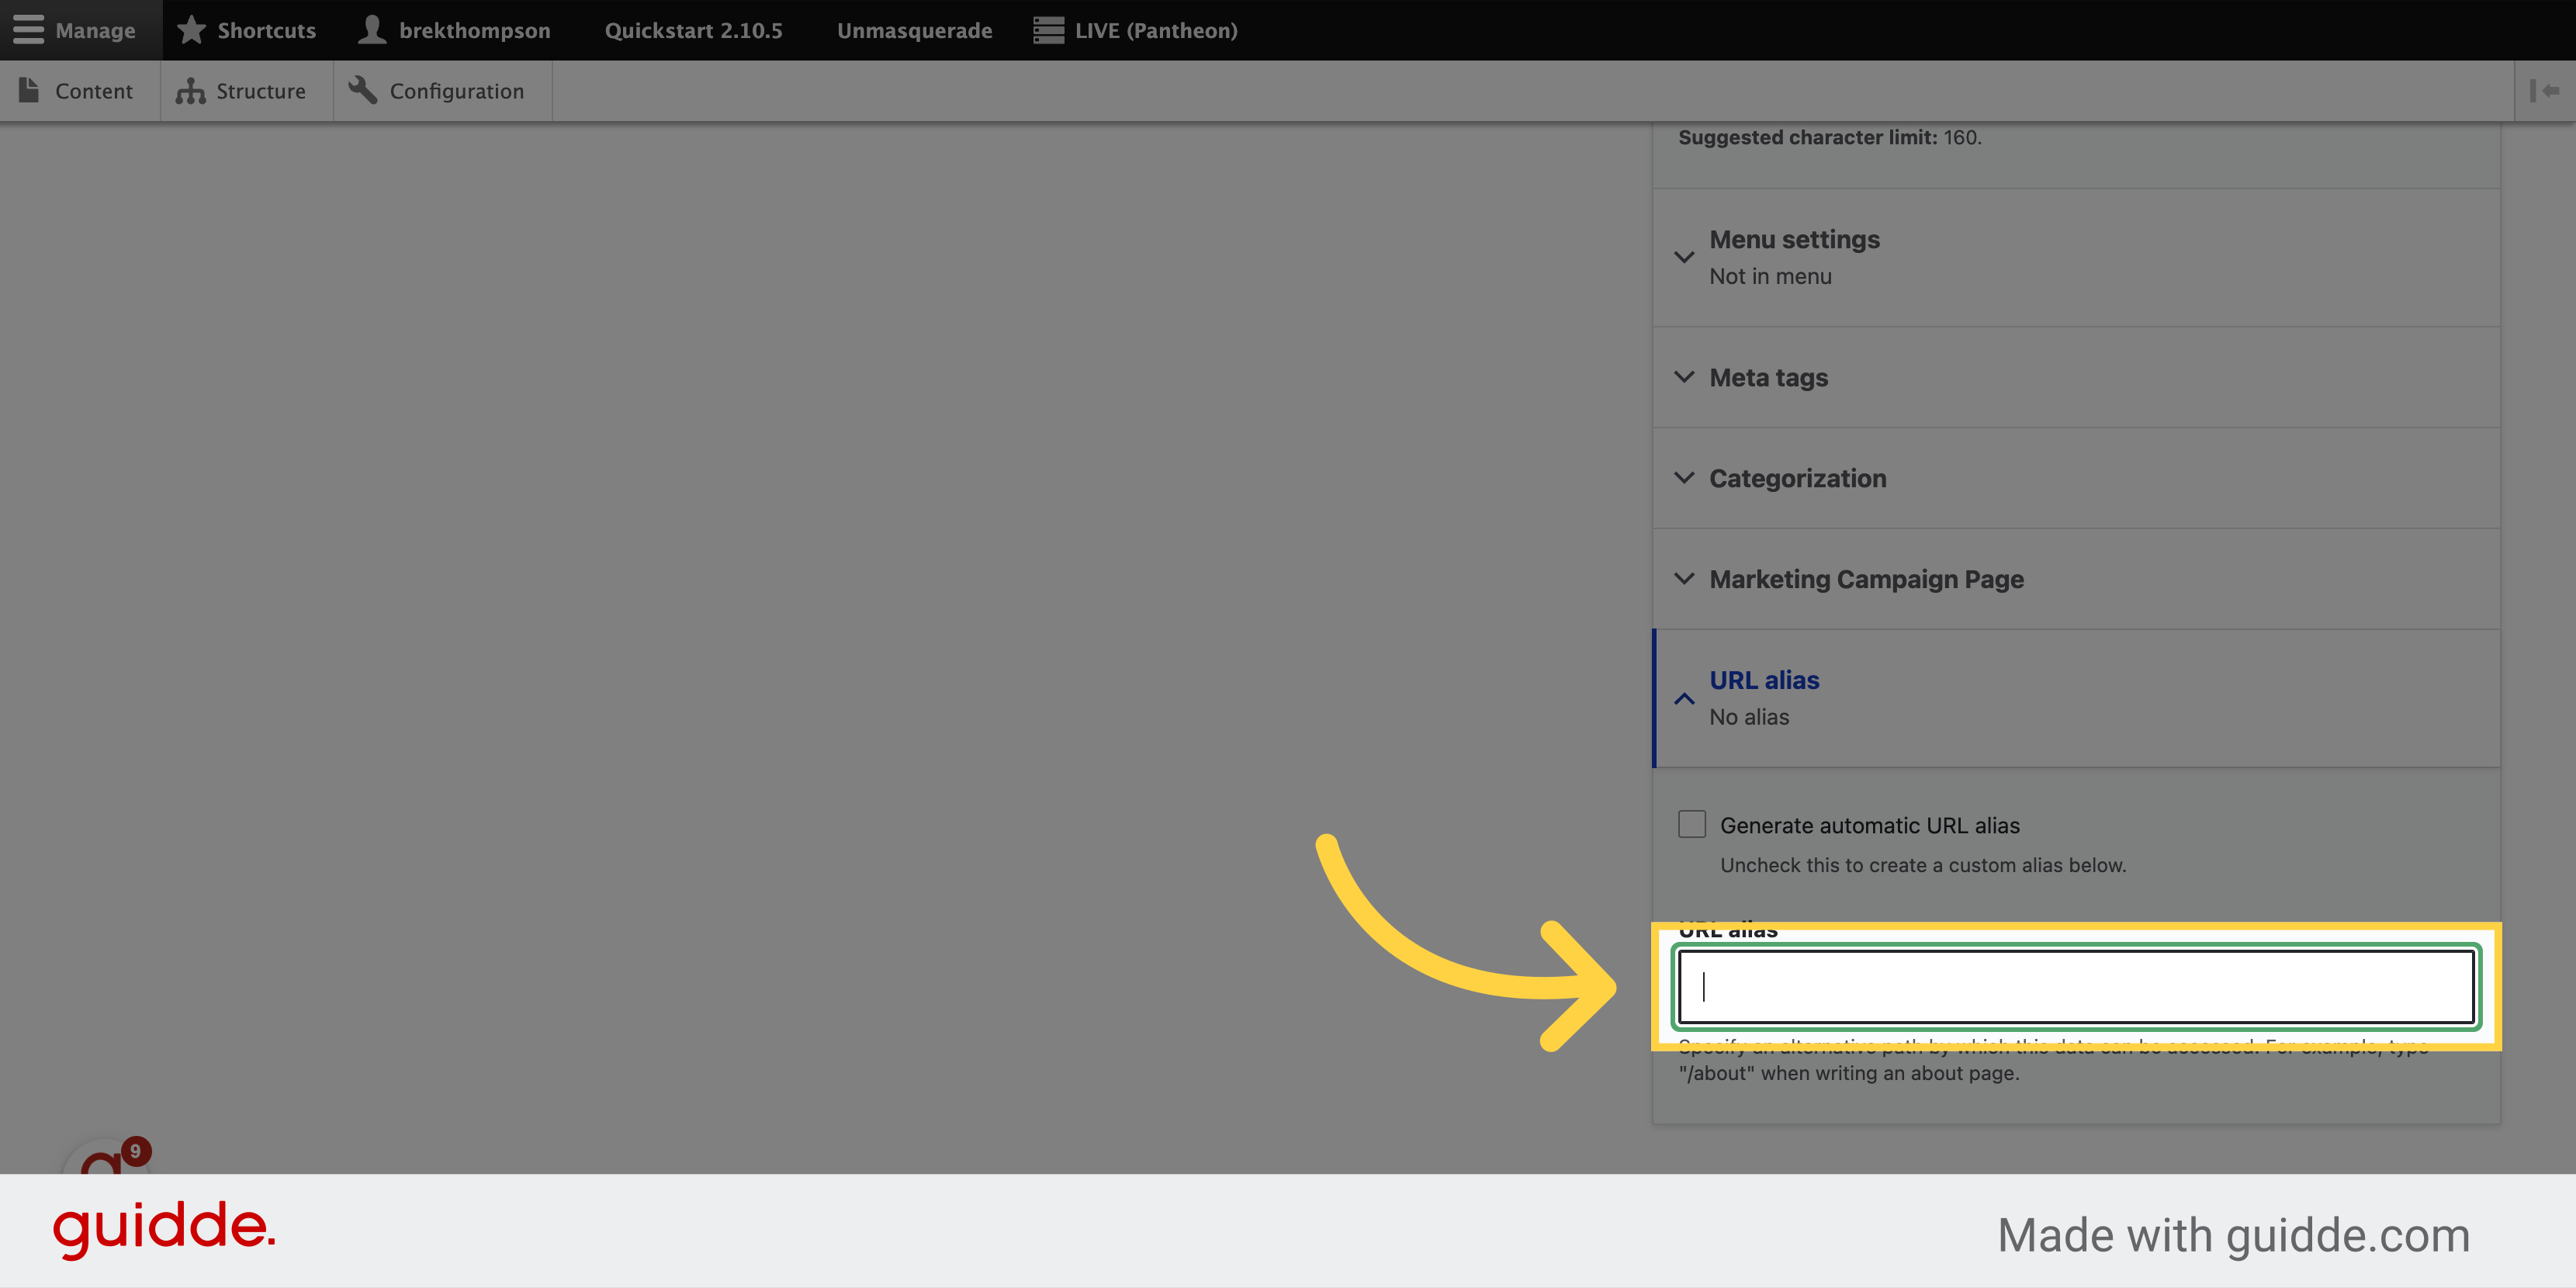
8. Type in the url path for your new page
I've already copied the parent path to my clipboard, meaning everything after "dot E D U." I'm pasting it here, making sure to start the path with a forward slash, then typing in the title of my subpage with hyphens between the words.
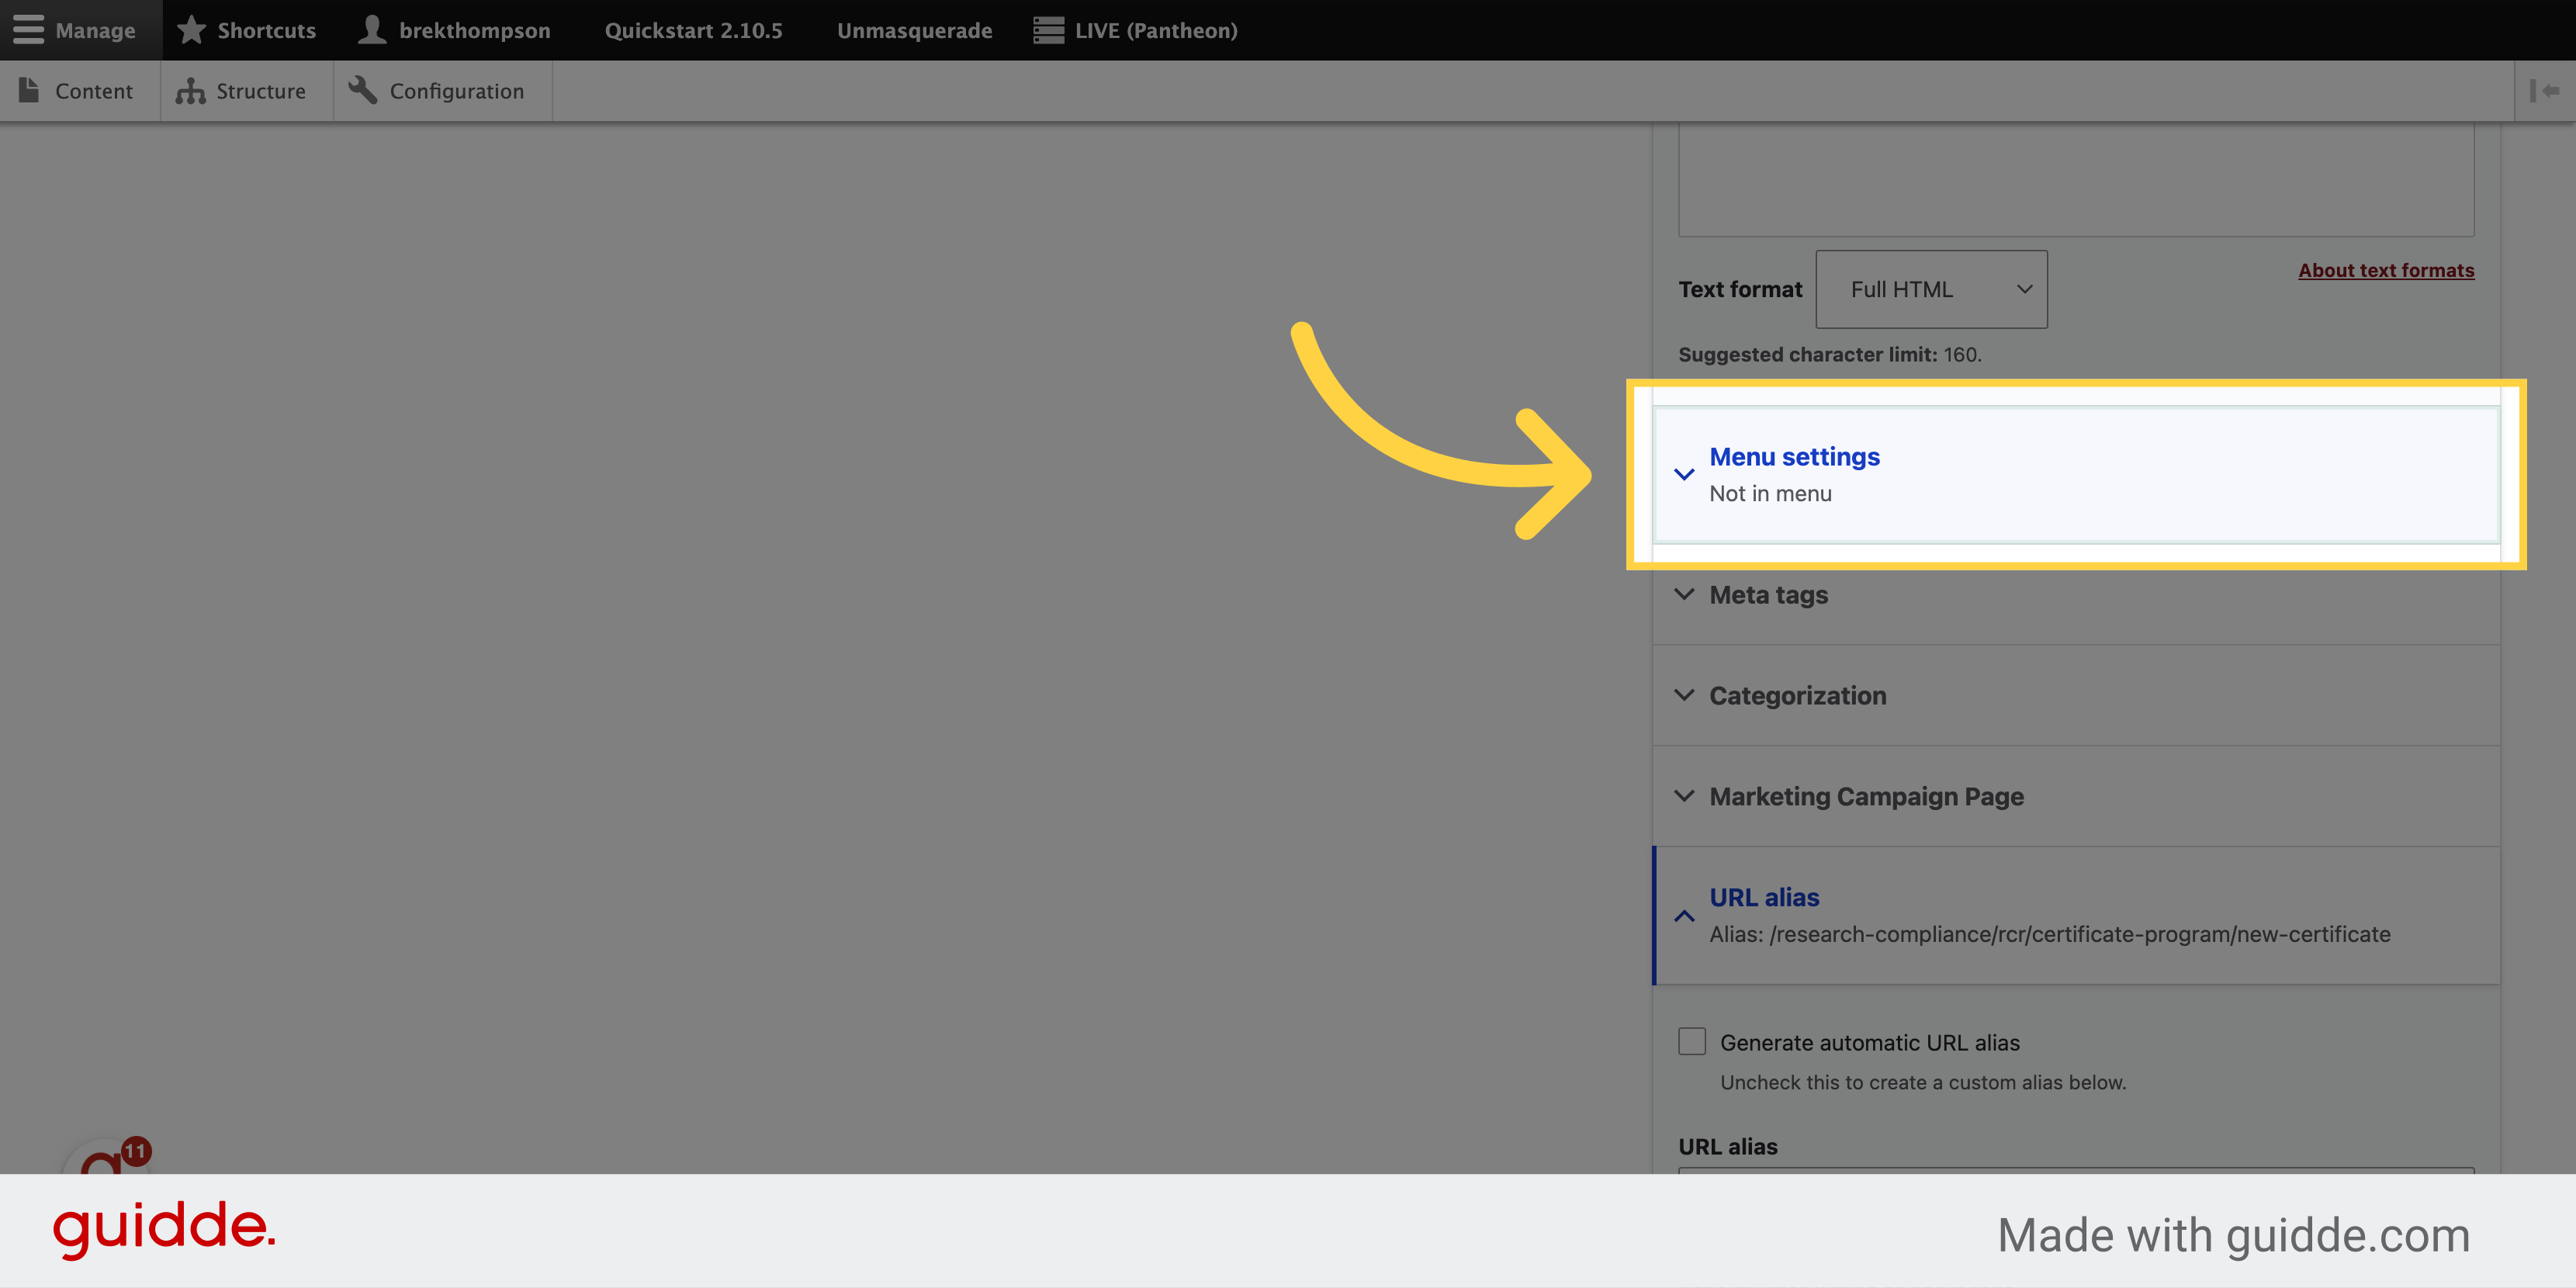
9. Click to expand the Menu settings panel
Now we want to assign it a place in the navigation menu. Click to expand the Menu settings panel.
10. Check the "Provide menu link" box
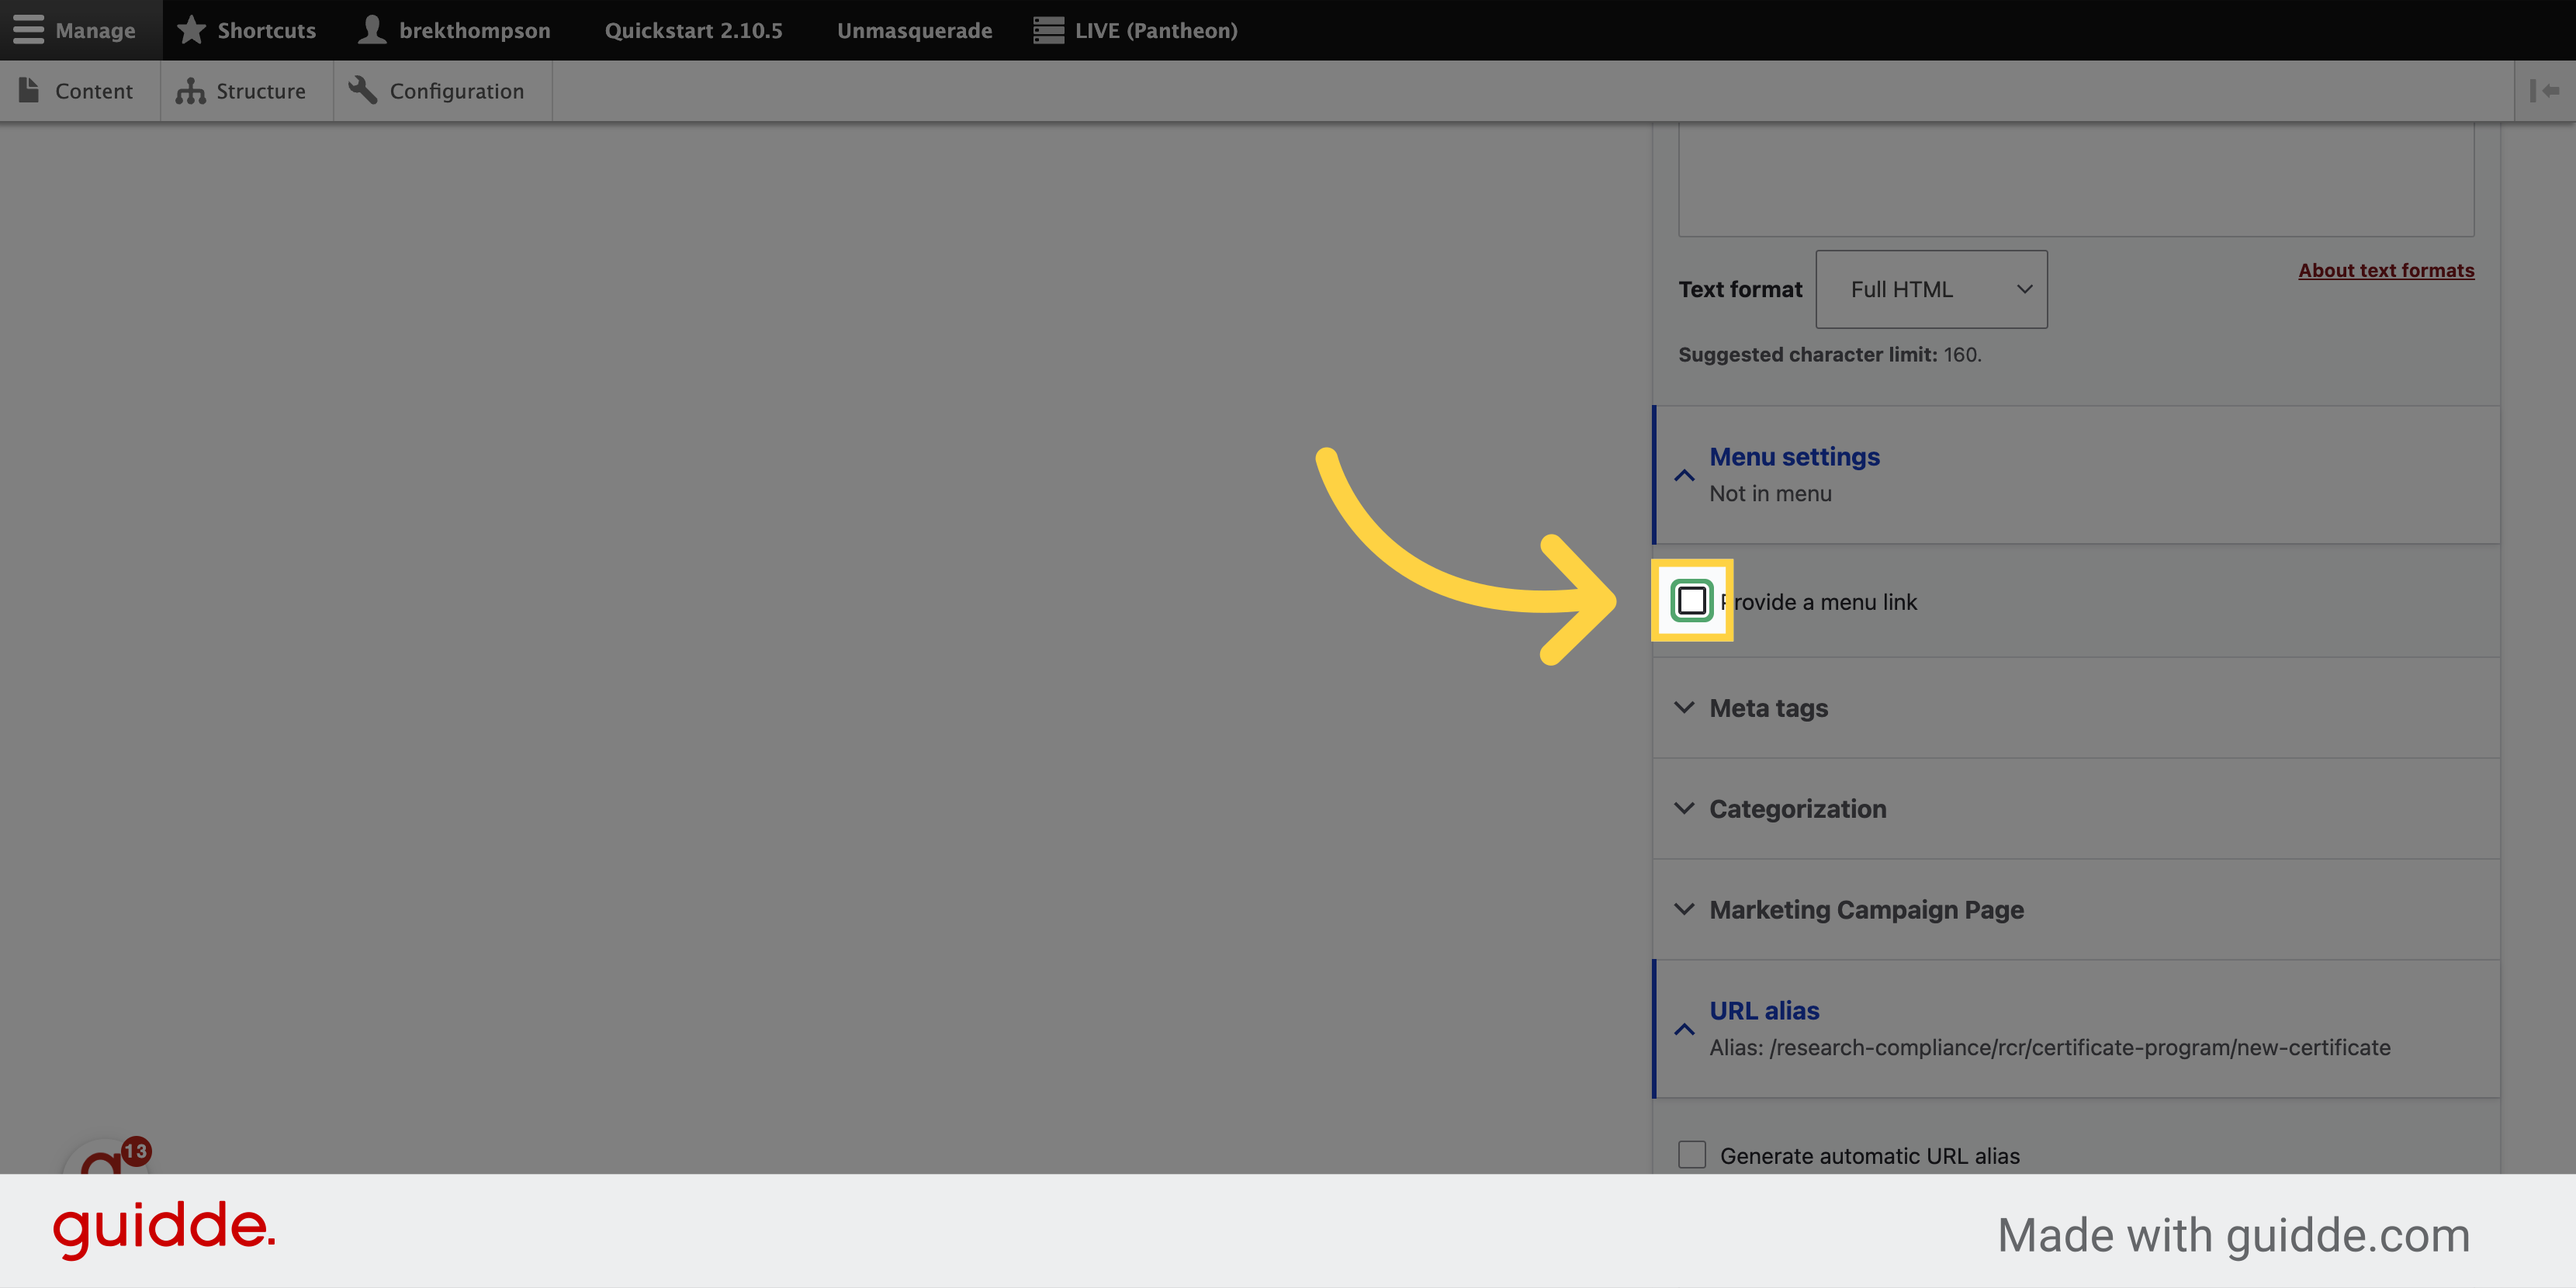
11. to make the editable fields appear
12. Here, you should only see the menus for the website sections you are responsible for maintaining.
Here's where we'll see the new improvements to the menu editing experience. You will only see the menu or menus pertaining to the site sections you are responsible for maintaining.
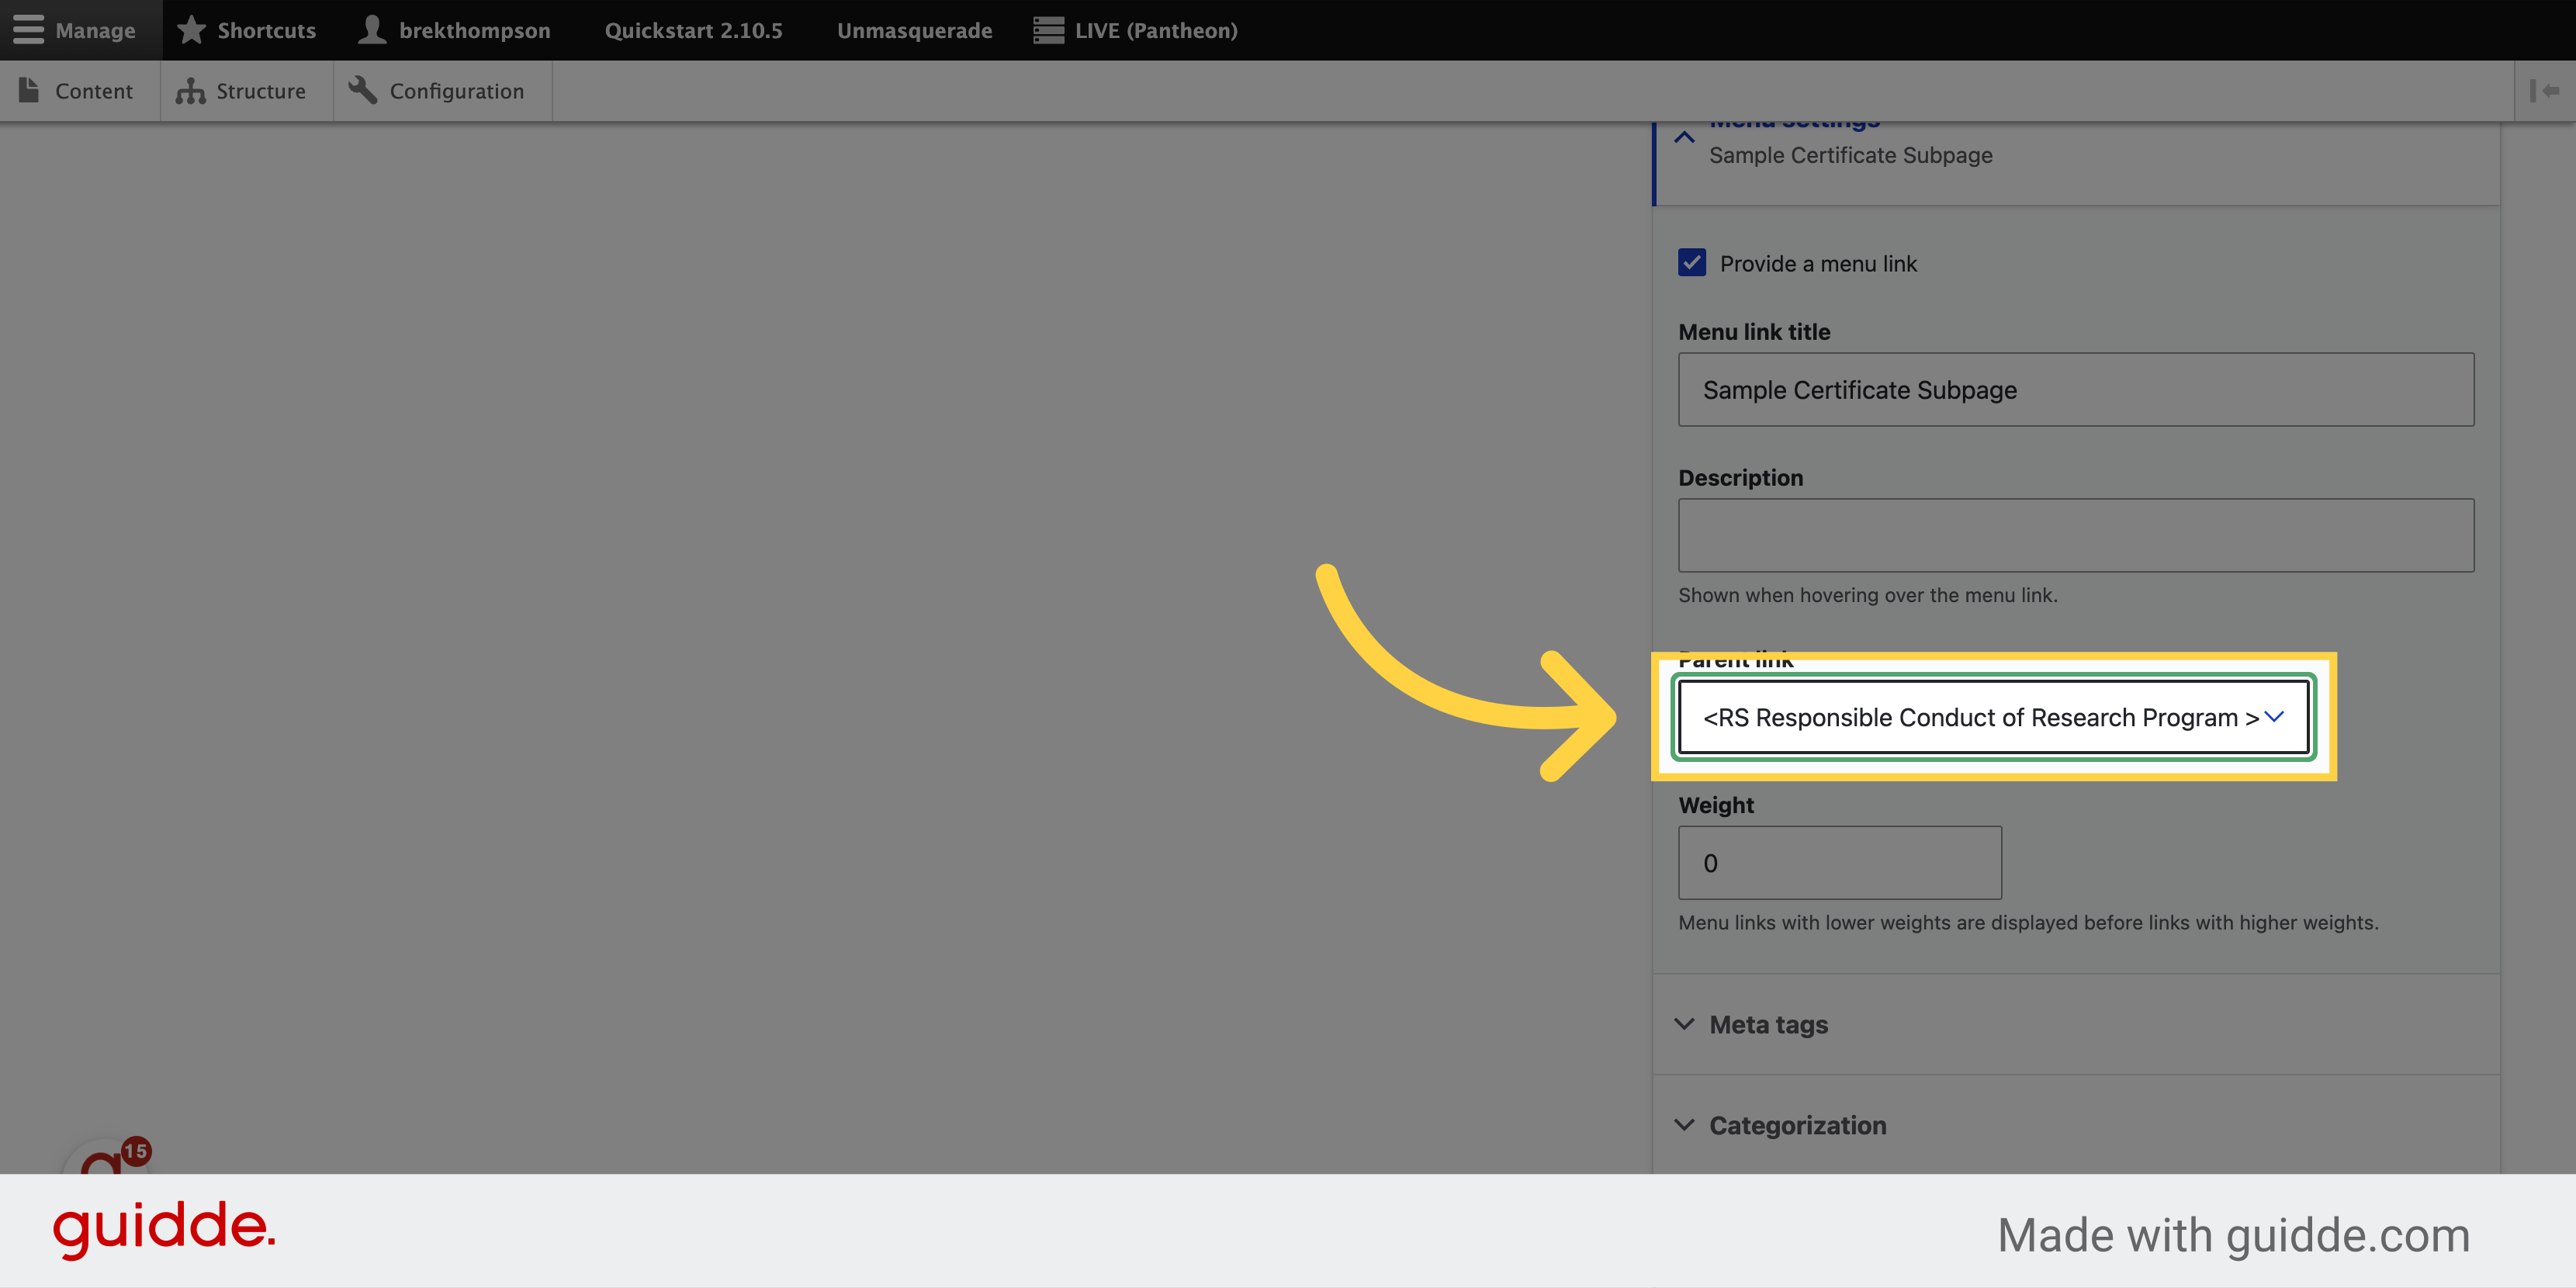
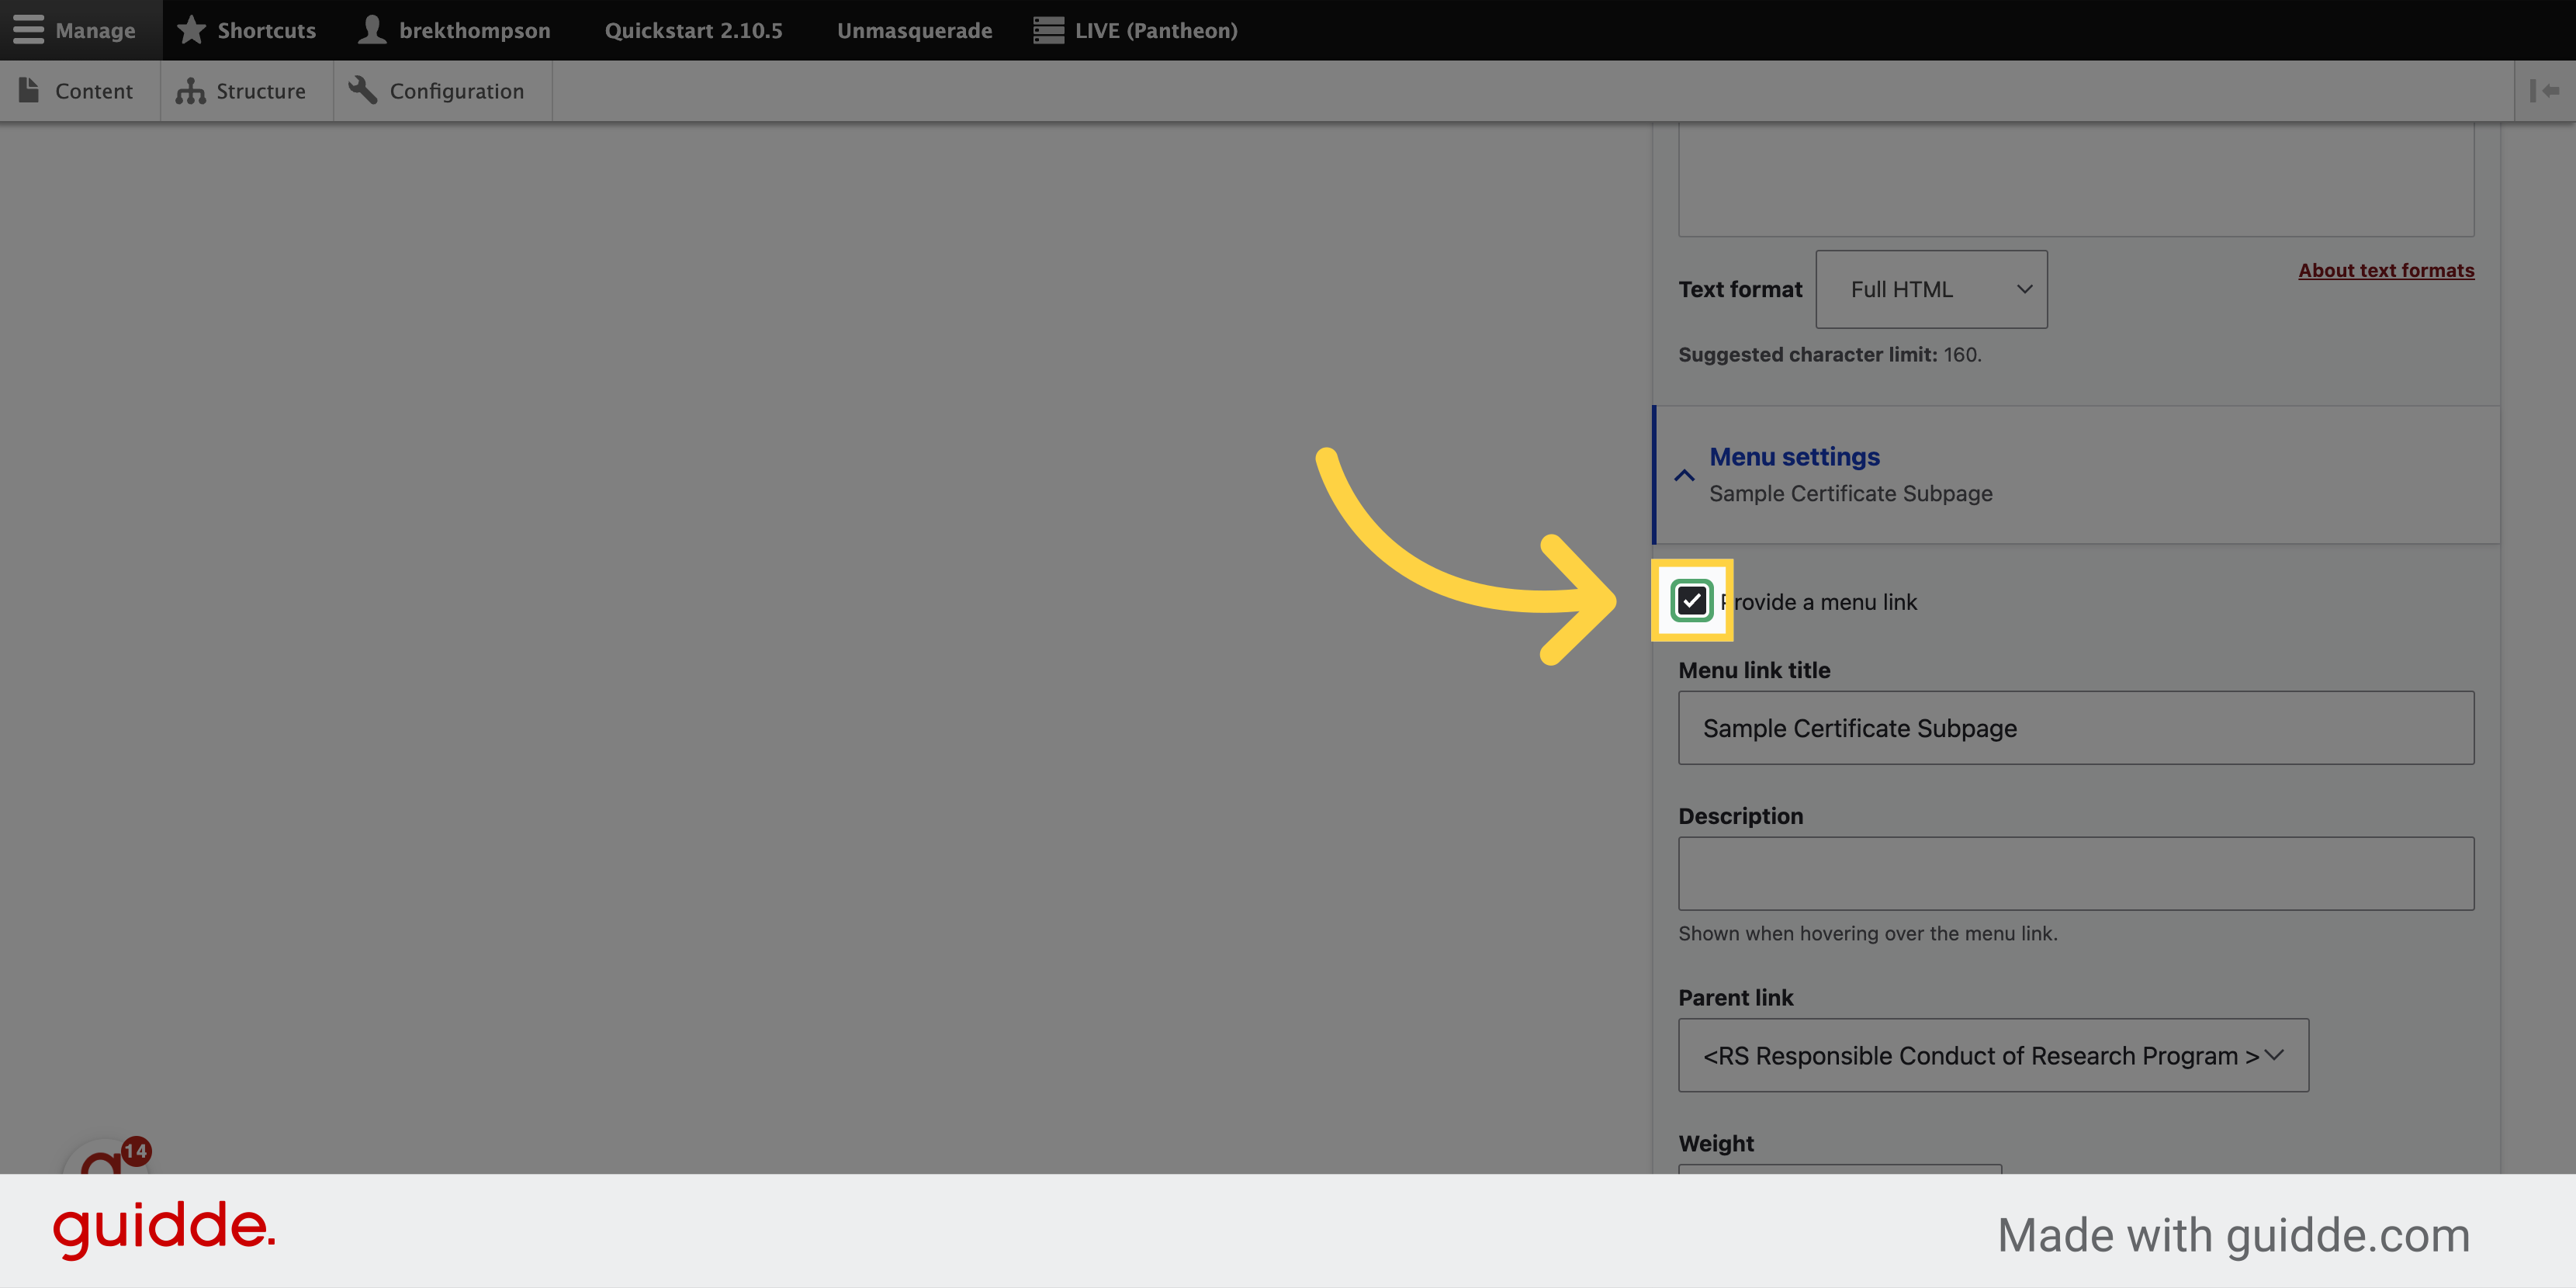
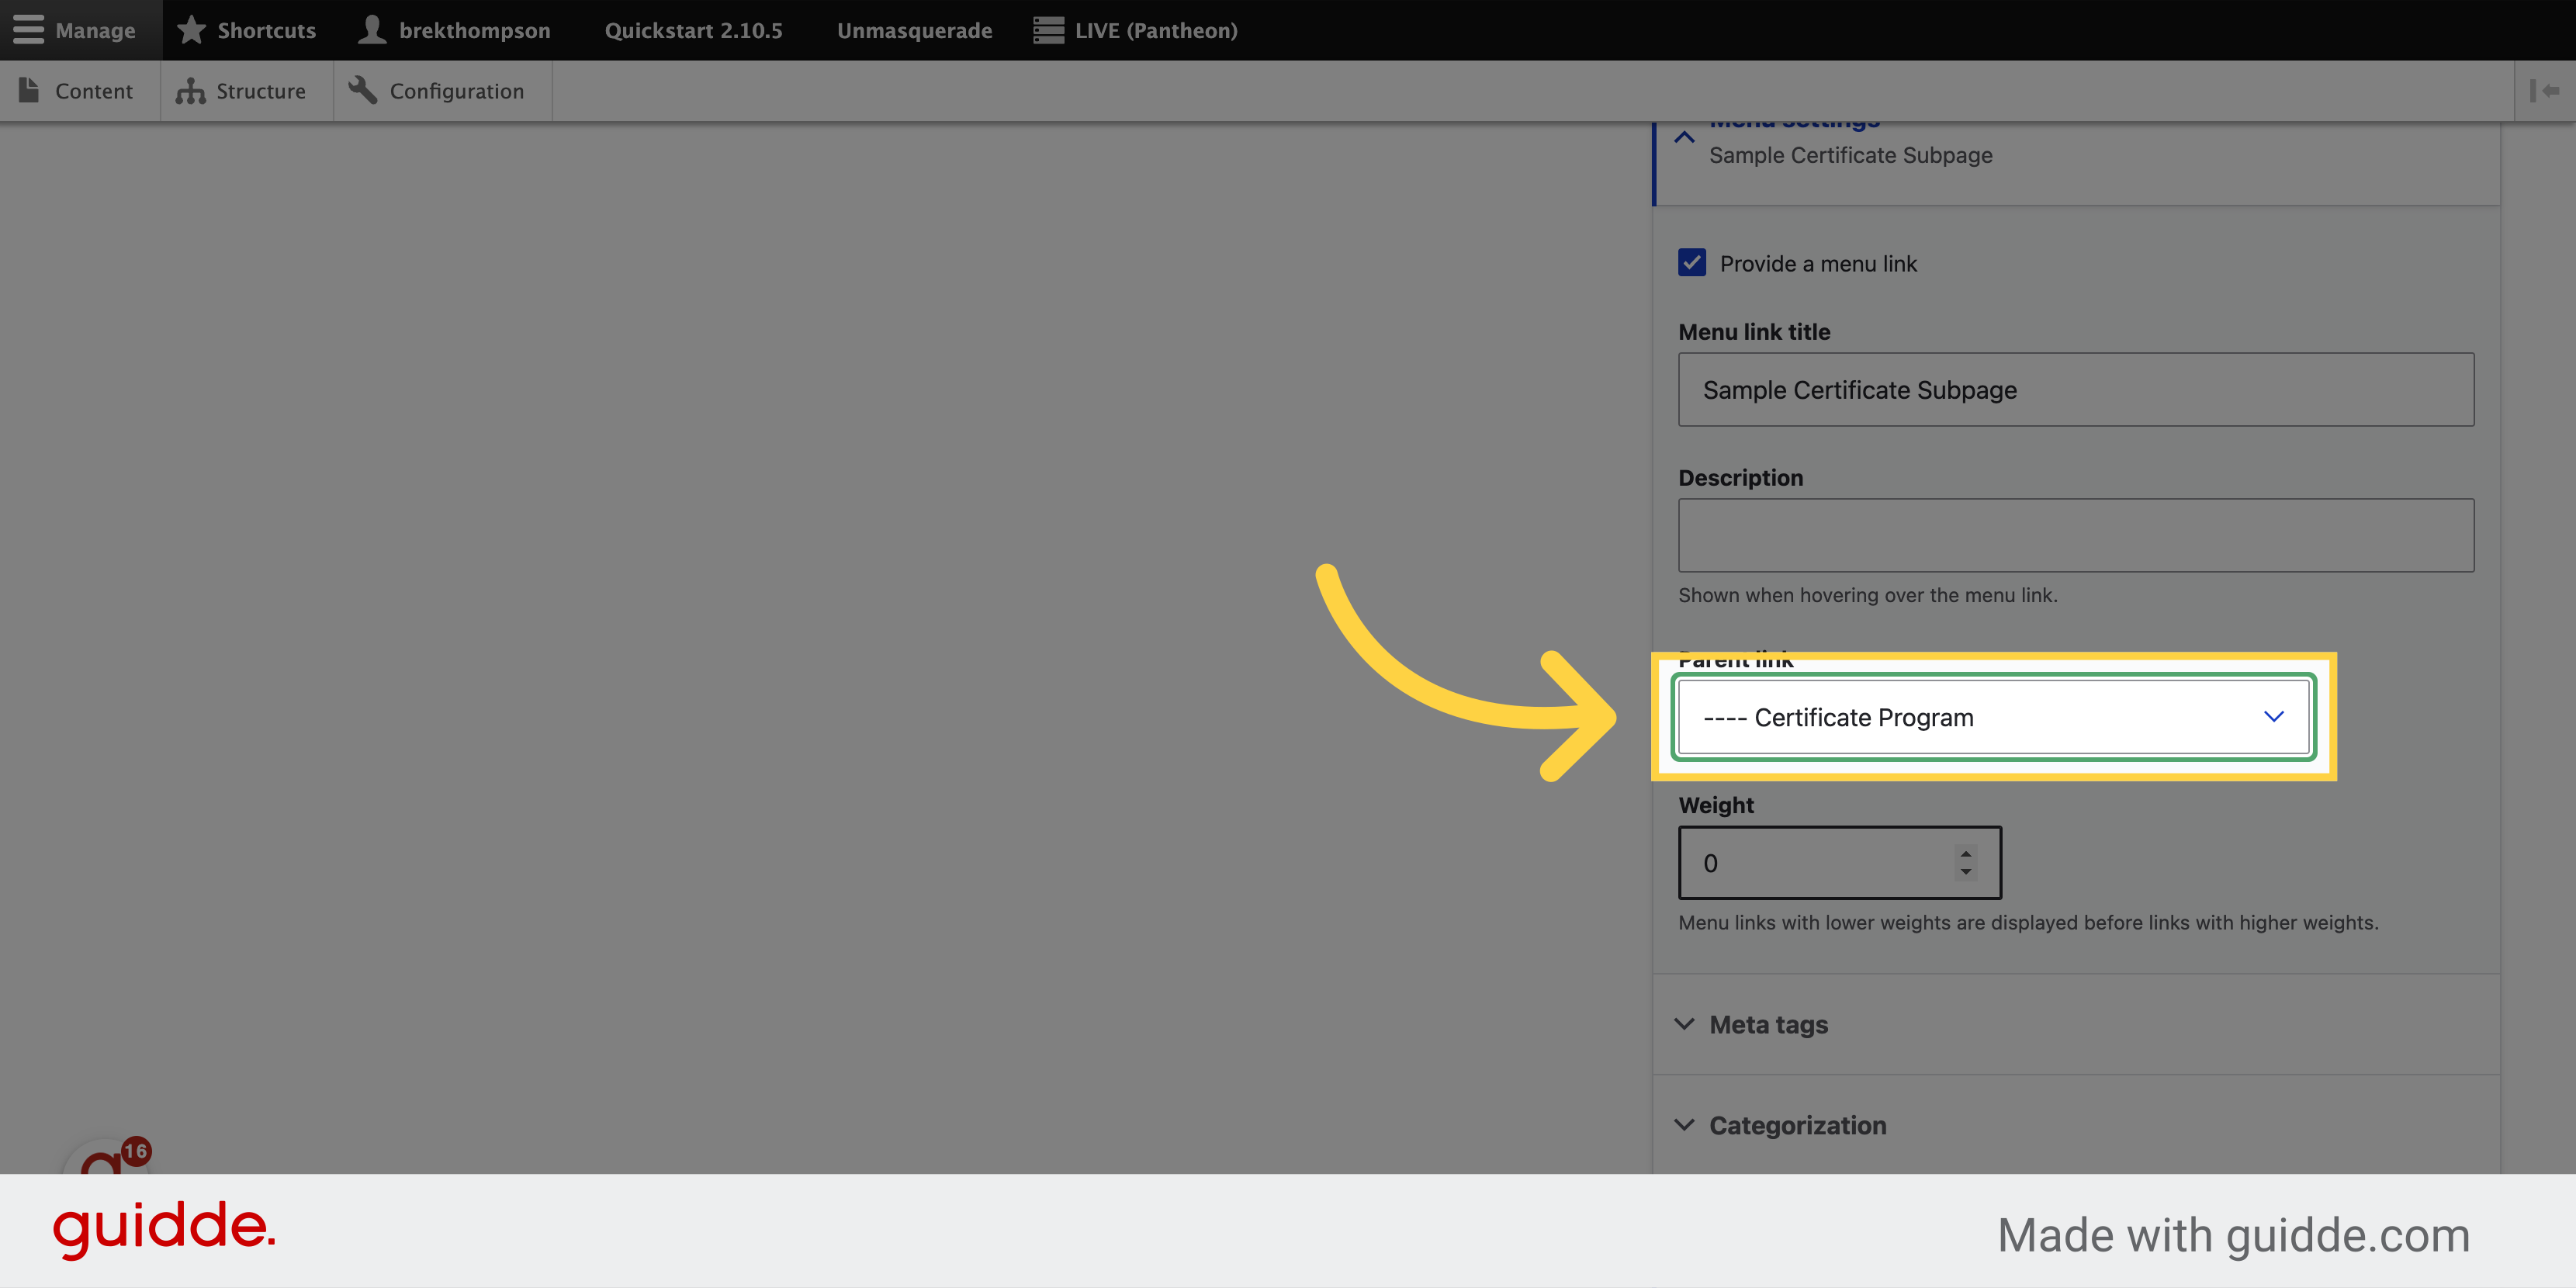
13. Select the parent link for your new page
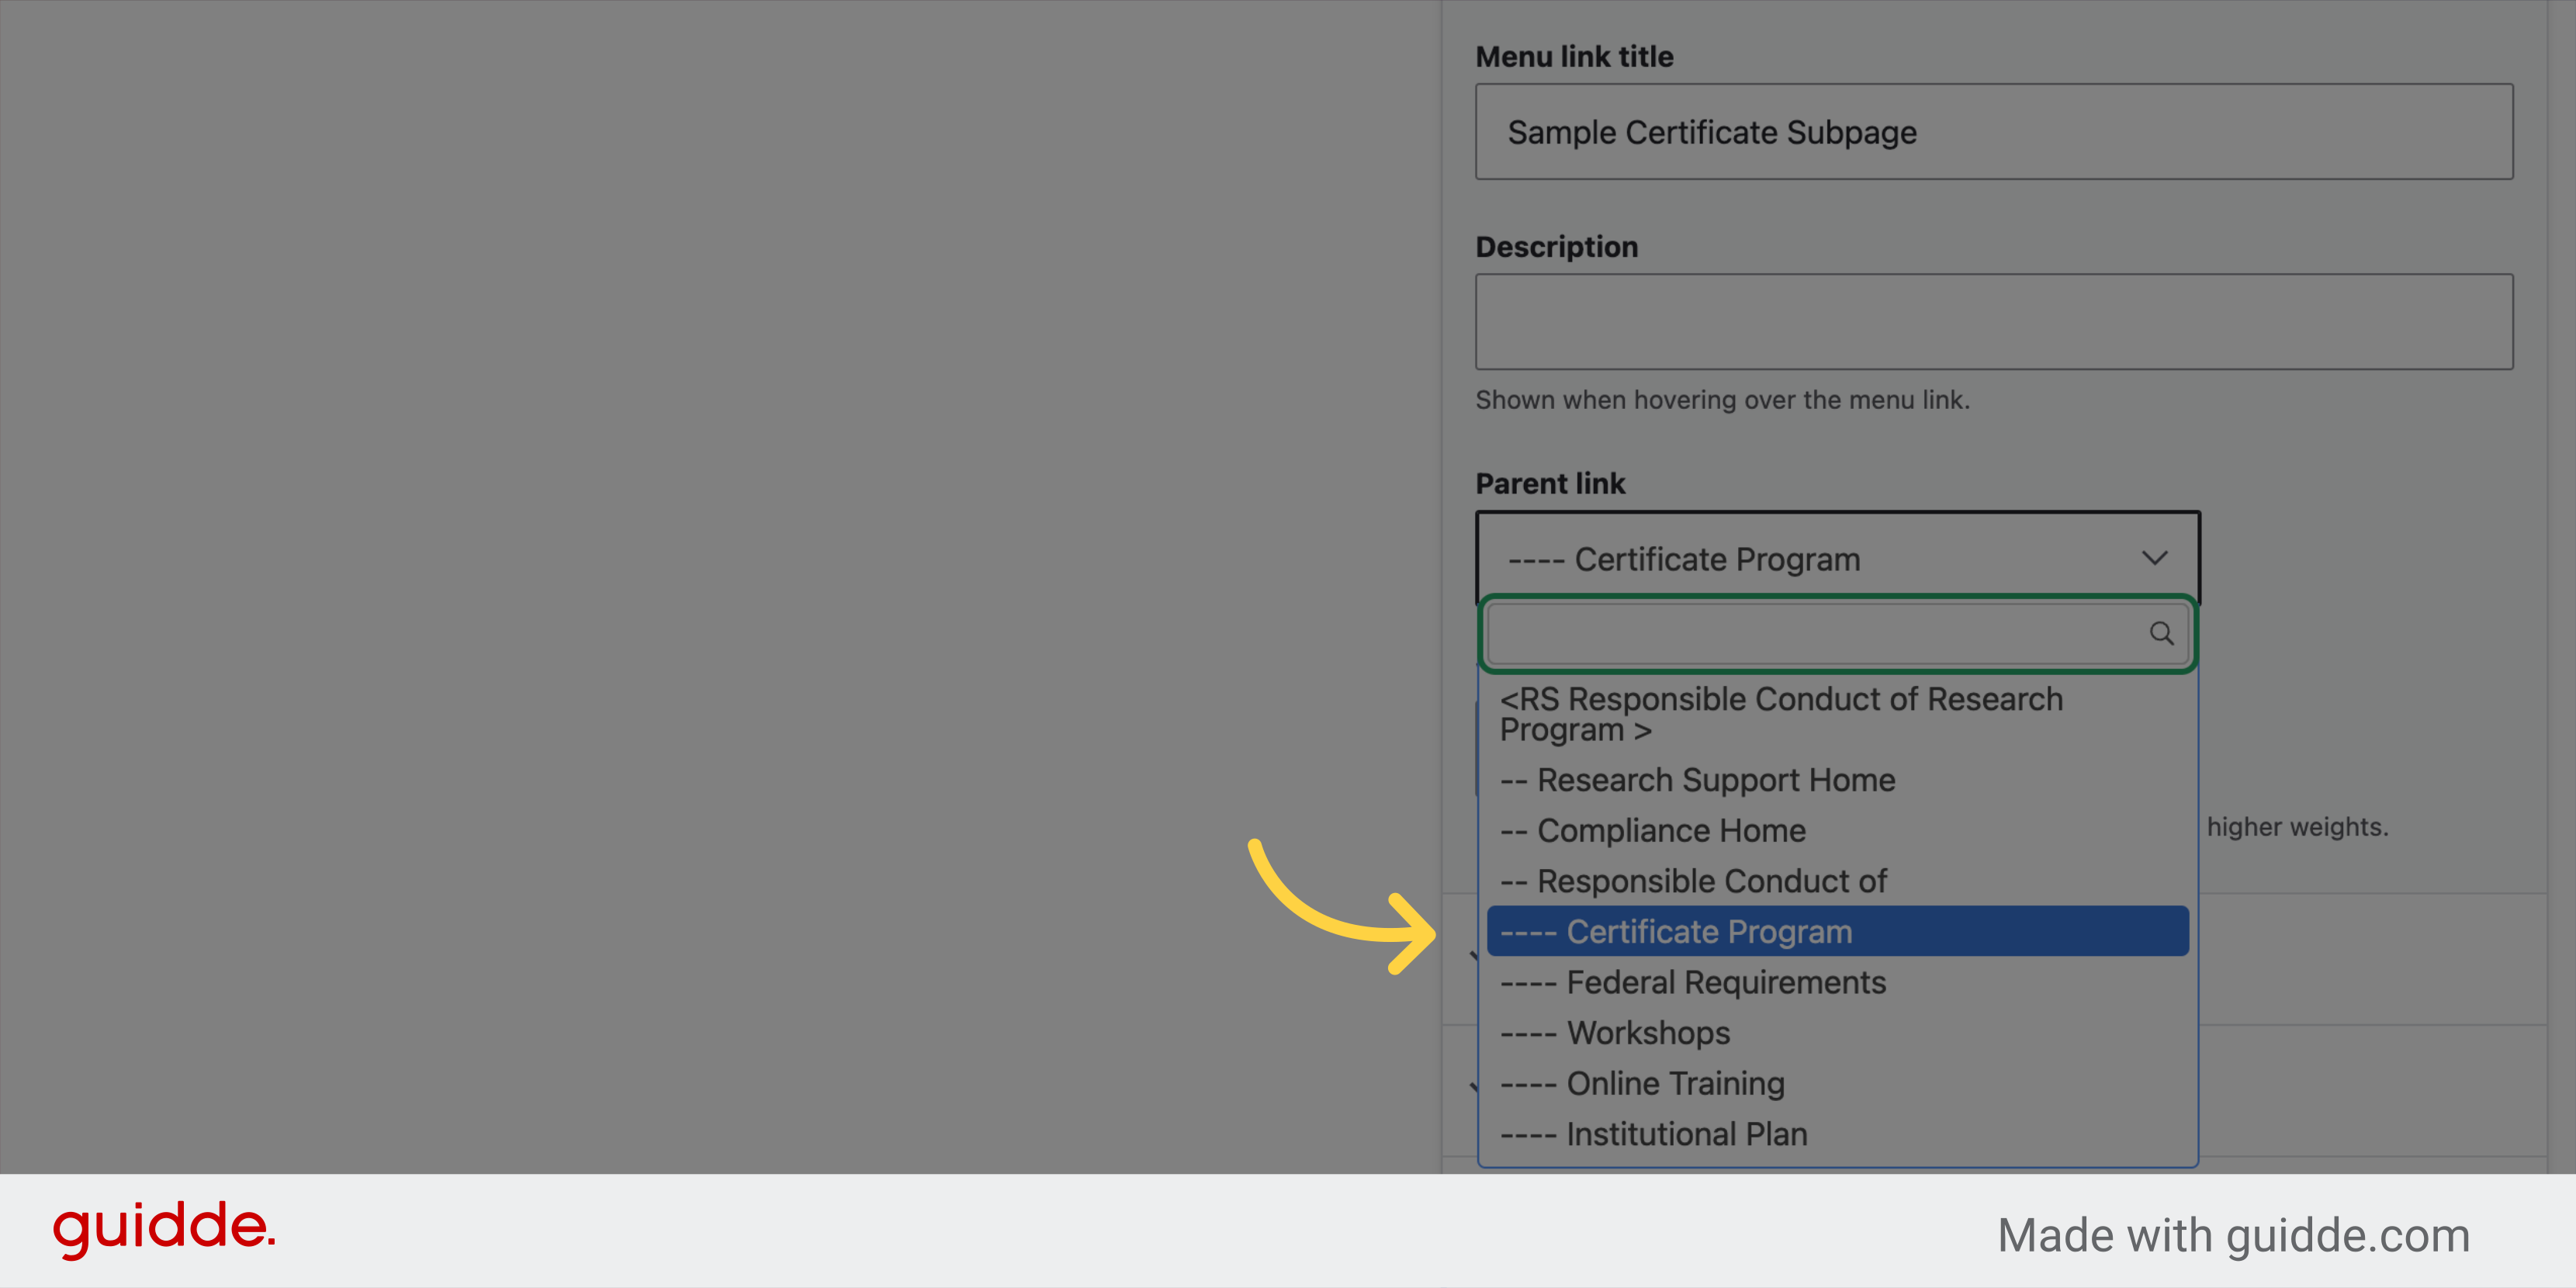
14. Select the parent link for your new page
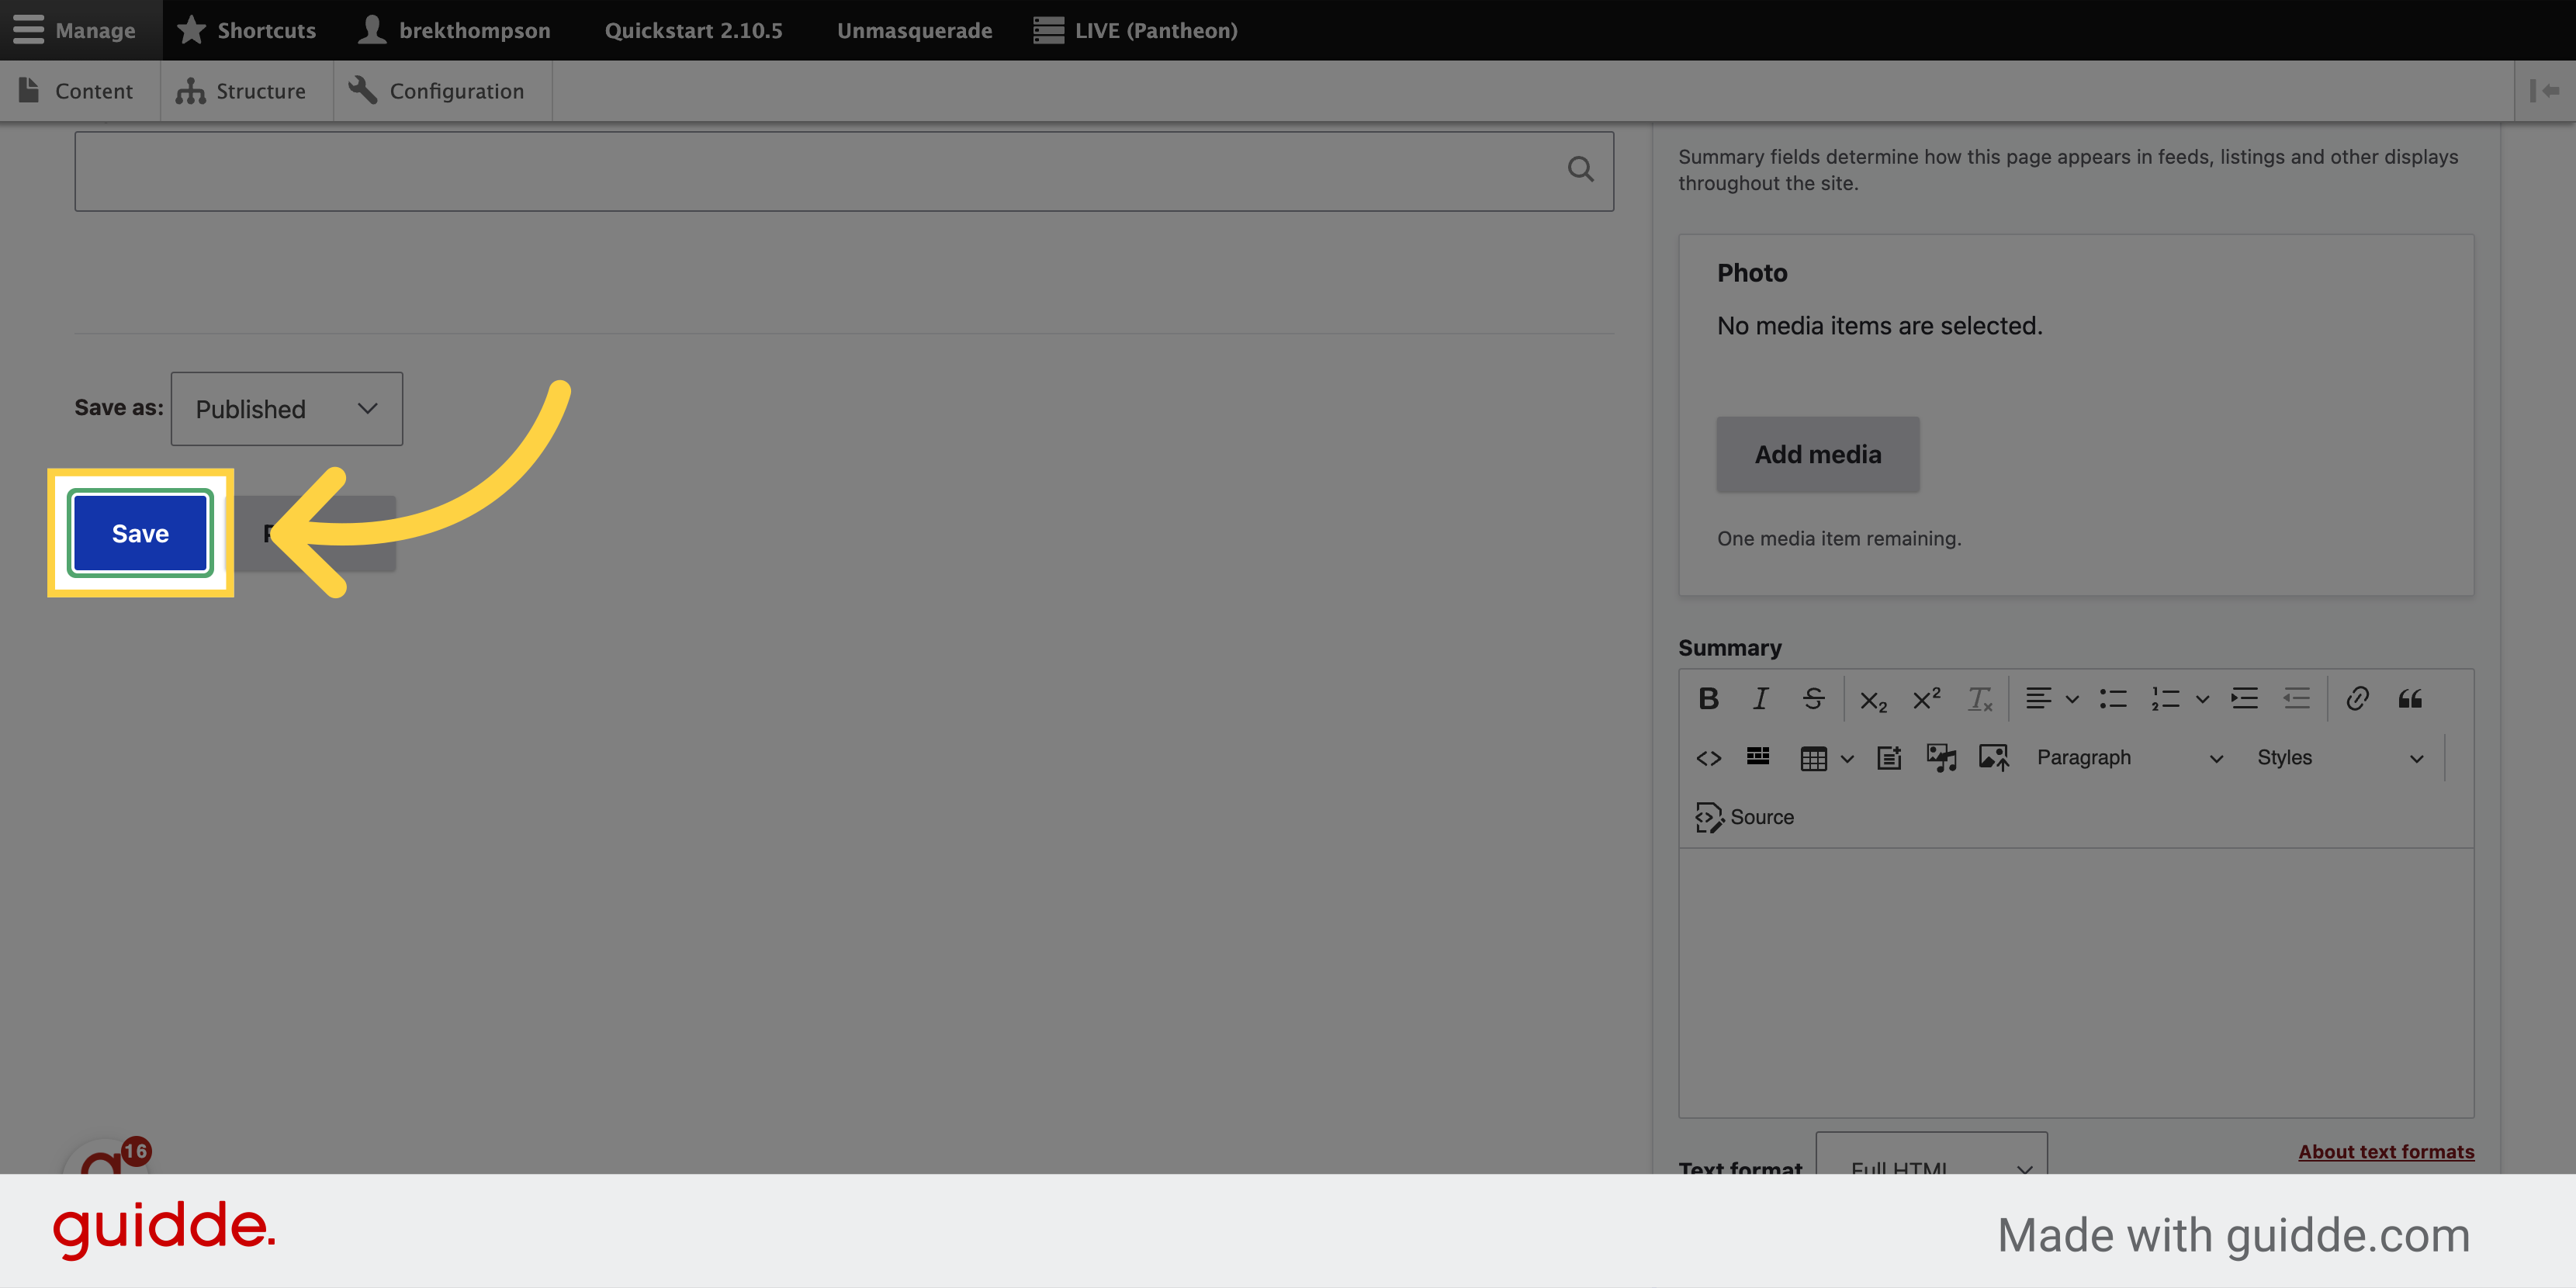
15. And finally, save your new page
16. Confirm the menu location of your new page
And here is our new page, located in the Responsible Conduct of Research program menu, under our parent link.

This guide covered detailed steps to add a new page to the research website navigation structure.
News communications or communications intended for external audiences:
First reference, headlines and titles:
The University of Arizona should be used on first reference. “The” should only be capitalized when beginning a sentence or headline. Lowercase “university” when standalone and on all subsequent references unless beginning a sentence.
Secondary reference, headlines and titles:
“Arizona” is the preferred second reference unless it creates confusion with the state of Arizona, as "Arizona" has multiple connotations, including State of Arizona government agencies. The optional second reference, “U of A”, can be used in copy and headlines. It must be written as “U of A” with spaces, and not “UofA” or any other deviation. When “U of A” is used as a noun, it must be referenced as “the U of A” and when it is used as an adjective, it stands alone as “U of A (noun)."
Use best judgment for usage beyond second references.
News & External Communications Examples:
- The University of Arizona was established in 1885.
- Arizona students come from all 50 states.
- Headline: 13 Unique Clubs at Arizona
- Alumni from around the world descend on the U of A for Homecoming Weekend.
- U of A researchers lead NASA-funded mission.
Marketing and Internal Communications:
First reference, headlines, or stand alone in text:
Use "The University of Arizona" on first reference, headlines, and when the name stands alone in text such as titles or website footers. “The” should only be capitalized when beginning a sentence or headline.
It is never written as possessive, e.g., “the University of Arizona’s College of Science.” Instead, it is “the University of Arizona College of Science” on first reference and “College of Science” on second reference.
Secondary reference:
“Arizona” is the preferred second reference for all internal and external audiences and occasions.
Optional secondary reference:
If your unit is unable to use ‘Arizona’ as its second reference (especially to avoid duplication with organizations outside the university) you may use ‘U of A’ as the second reference. It must be written as “U of A” with spaces, and not “UofA” or any other deviation. When “U of A” is used as a noun, it must be referenced as “the U of A” and when it is used as an adjective, it stands alone as “U of A (noun)”.
Example:
First reference: University of Arizona College of Nursing
Second reference: U of A College of Nursing
Subsequent references: College of Nursing
Use best judgment for usage beyond secondary references.
Marketing & Internal Communications Examples:
- The University of Arizona is home to 23 colleges and 150+ majors and degrees.
- At the University of Arizona, students can choose from more than 400 clubs
- Here’s how six incredible women in science, technology, engineering and math at Arizona are making the world better.
- Discover life at U of A — the clubs, classes and activities that will help you be your best self.
Please note: As of 7/1/24, “UArizona” is officially retired and should no longer be used except in pre-existing instances.
Social Media Handles:
A unit's profile name should be search-friendly and follow the naming convention of “uofa” or “arizona” combined with the unit name. Please reach out to brand@arizona.edu for approval on all new social media handles.
References no longer used:
“UA” and “UAZ” and must not be used in any communications or social media handles. “UAZ” is only allowed in social media handles prior to 7/1/2024.
University of Arizona Global Campus
UAGC is operated in affiliation with the University of Arizona and offers degrees that are 100% online. However, the two institutions are separate organizations with separate governance and administration. They also have separate accreditations, faculty, staffs, schools, colleges, departments and program offerings, and they award separate degrees.
UAGC operates separately from Arizona Online, as they have separate accreditations, faculty, staff, schools, colleges, departments and program offerings, and they award separate degrees.
University of Arizona Mall
On second reference, the Mall is acceptable.
UA NetID
The official personal identifier for University of Arizona faculty, staff and students. Your NetID permits secure access to a variety of applications and services using a single sign-on (one username and one password) system.
University of Arizona Foundation
The University of Arizona Foundation is a nonprofit corporation dedicated to advancing the university by building relationships, securing philanthropic support and stewarding assets. The Foundation is acceptable on second reference.
University of Arizona Health Sciences
Health Sciences is acceptable on second reference. Health Sciences comprises the following entities:
- College of Medicine – Tucson (do not use COM or COM-T on second reference)
- College of Medicine – Phoenix (located within the Phoenix Biomedicine Core)
- College of Nursing
- R. Ken Coit College of Pharmacy (Coit College of Pharmacy on second reference)
- Mel and Enid Zuckerman College of Public Health (Zuckerman College of Public Health on second reference)
- College of Health Sciences (opening in fall 2023)
- University of Arizona Cancer Center (Arizona Cancer Center on second reference)
University of Arizona Near You Network
NYN includes locations in Chandler, Douglas, Gilbert, Nogales, North Valley (Phoenix) and Yuma.
- University of Arizona at Chandler (On first reference, it’s the University of Arizona at Chandler. On second reference, it’s Chandler center.)
- University of Arizona at Douglas (On first reference, it’s the University of Arizona at Douglas. On second reference, it’s Douglas center.)
- University of Arizona at Gilbert (On first reference, it’s the University of Arizona at Gilbert. On second reference, it’s Gilbert center.)
- University of Arizona at Nogales (On first reference, it's the University of Arizona at Nogales. On second reference, it's Nogales center.)
- University of Arizona at North Valley (On first reference, it’s the University of Arizona at North Valley. On second reference, it’s North Valley center.)
- University of Arizona at Yuma (On first reference, it’s the University of Arizona at Yuma. On second reference, it’s Yuma center.)
University of Arizona Phnom Penh
This location is part of Arizona International. On first reference, it’s the University of Arizona Phnom Penh. On second reference, it’s Phnom Penh microcampus.
University of Arizona at Pima College
On first reference, it’s the University of Arizona at Pima College. On second reference, it’s Pima East or Pima Desert Vista.
University of California
The campus location is preceded by a comma: "She visited the University of California, Santa Cruz and the University of Arizona."
https://marcom.arizona.edu/communications/written-style-guide#u
Visit this Quickstart page for full description: https://quickstart.arizona.edu/site-admin/analytics
Known issues
We are aware of the following issues and actively working on solutions. We appreciate your patience, and encourage you to report to us any issues you don't see listed here.
We've assigned roles based on content editors' primary unit, limiting access to the most relevant parts of the navigation. This helps streamline menu management.
In rare cases, if you edit and save a page outside your assigned area, its menu link may shift to the top of your own unit’s menu.
Example: You're assigned to RDS but edit a page in the Administration section. Even if you don't change the menu link, saving the page may cause it to move from the Administration menu to the top of the RDS menu.
If you regularly need access to more than one section, contact us to expand your permissions.
If a menu link ends up in the wrong place, reach out and we’ll restore it.